
Sandesh (also spelled Sondesh) stands proudly among the most cherished sweets in Bengali cuisine—a true gem in the world of Indian desserts. Made from just a few simple ingredients, this delicate sweet showcases the magic of fresh chenna (Indian cottage cheese) combined with the subtle aroma of cardamom or rose water and a touch of sweetness.
What makes Sandesh truly special is its light, melt-in-the-mouth texture and elegant simplicity. It’s not overly rich or syrupy like some other Indian sweets, making it a popular choice for those who enjoy mildly sweet desserts. Whether molded into beautiful shapes, garnished with slivers of pistachio, or flavored with saffron or fruit puree, Sandesh adapts beautifully to both traditional and modern variations.
This recipe is incredibly beginner-friendly and nearly foolproof. Even if you’ve never made Indian sweets before, you can whip up a batch of soft, delicious Sandesh with minimal effort. It’s ideal for celebrating festivals like Durga Puja, Diwali, or Raksha Bandhan, and also perfect for parties, special occasions, or as a heartfelt homemade gift.
Whether served at the end of a festive meal or offered to guests during holidays, Sandesh brings with it the warmth and joy of Bengali hospitality. Its charm lies in its pure, fresh flavors and the nostalgic connection it holds for anyone familiar with Indian celebrations.
What is Sandesh (Sondesh)?
Sandesh, also known as Sondesh in Bengal, is one of the most iconic sweets from Bengali cuisine. It’s a soft, melt-in-the-mouth dessert made primarily from fresh chenna (curdled milk solids), lightly sweetened, and often garnished beautifully with nuts or saffron. Unlike heavy syrupy sweets, Sandesh is delicate and refined, making it perfect for festivals, gifting, or simply enjoying with evening tea.
Why You’ll Love This Recipe
Requires only 3 basic ingredients – milk, lemon juice, and sugar
No complicated techniques – easy for beginners
It can be prepared in advance and stored in the refrigerator until needed.
Great for Diwali, Durga Puja, Holi, birthdays, or family get-togethers
Ingredients for Sandesh
- Full-fat milk – 2 liters (cow’s milk is ideal for a creamier texture)
- Lemon Juice or Vinegar – 2–3 tablespoons, freshly squeezed
- Sugar – ¼ to ⅓ cup, adjust based on sweetness preference
- Optional garnishes – chopped pistachios, almonds, saffron strands, rose petals
How to make chenna?
1. Prepare the Strainer Setup
Start by lining a large fine-mesh strainer or colander with a clean muslin cloth, a thin cotton kitchen towel, or several layers of cheesecloth. Place this over a deep bowl or pot to collect the whey, which drains out during the curdling process. This step ensures easy separation of solids from the liquid.
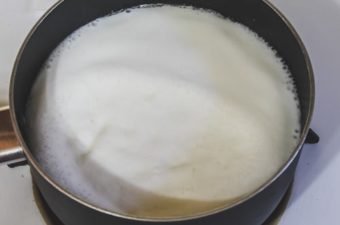
2. Heat the Milk
Add 2 liters of full-cream milk to a thick-bottomed pan or pot. If possible, use cow’s milk for the best texture and flavor. Turn the heat to medium and stir frequently using a flat spatula or ladle to prevent the milk from sticking to the bottom or developing a burnt taste. Keep heating the milk, stirring occasionally, until it reaches a steady rolling boil.
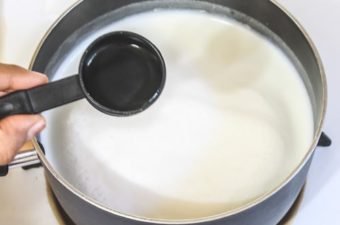
3. Add the Acid (Lemon Juice or Vinegar)
Once the milk starts bubbling vigorously, immediately switch off the heat. Begin adding freshly squeezed lemon juice (or vinegar), one spoon at a time, while gently stirring in a circular motion. In a short while, the milk will begin to curdle, separating into pale green whey and soft white chenna.
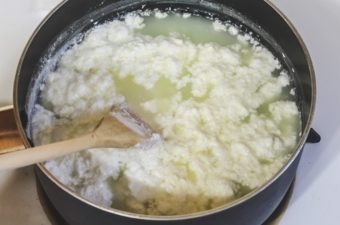
4. Ensure Complete Curdling
If the milk hasn’t curdled completely and you still see milky portions, add a little more lemon juice gradually. Avoid adding too much in one go, as it can make the chenna overly sour. Stir gently and give it a minute to fully separate.

5. Strain the Curds from the Whey
Once the curdling is complete, carefully pour the contents into the prepared cloth-lined strainer. Be cautious—it will be hot. The liquid that collects in the bowl is whey, which you can save and use later in gravies, soups, dals, or even for kneading roti dough for added softness and nutrition.
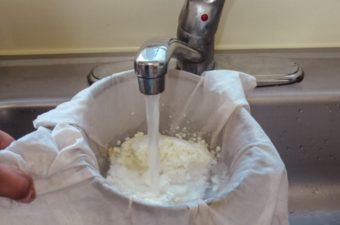
6. Rinse to Remove Sourness
To remove the lemony or acidic taste, rinse the collected chenna under cold running water for a few seconds. This also helps to cool it down quickly, making it easier to handle in the next steps.
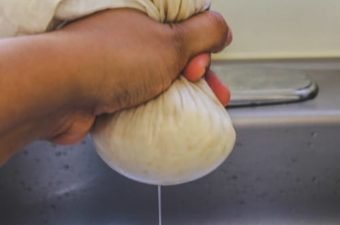
7. Drain Excess Water
Gather the edges of the cloth and twist it into a bundle. Gently squeeze out as much water as possible without pressing too hard, which could make the chenna dry and crumbly. For better drainage, you can hang the bundle from a kitchen hook or tap and let it drip for 20 to 30 minutes.
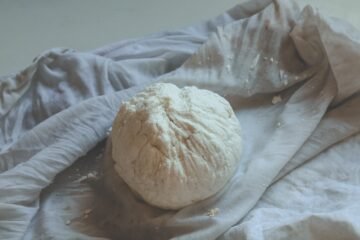
8. Chenna is Ready to Use
After draining, open the cloth and check the texture. The chenna should feel soft, moist, and slightly crumbly but still hold together when gently pressed. It’s now ready to be used in a variety of Indian sweets like Sandesh, Rasgulla, Rasmalai, or even savory snacks and fillings.
How to make Sandesh Recipe?
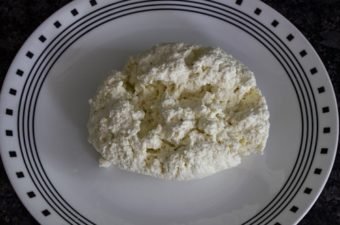
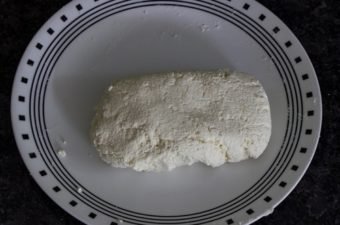
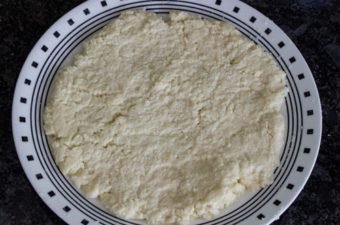
1) Transfer the Prepared Chenna to a Plate
Place the freshly made chenna onto a clean, wide plate or work surface. From 2 liters of full-fat milk, you will typically get around 300–350 grams of chenna, although this may vary depending on the fat content and quality of the milk used. Keep in mind, the final yield affects the rest of the recipe, particularly the amount of sugar. Adjust the sugar quantity based on how much chenna you obtain.
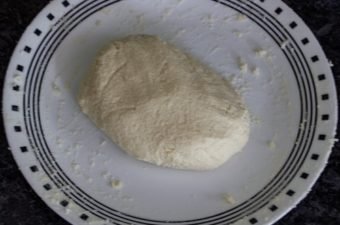
2) Knead Until the Texture Turns Smooth
Using the heel of your palm, begin kneading the chenna on the plate or a smooth surface. Apply gentle pressure and stretch it while folding it back repeatedly. This process breaks down any grainy bits and transforms the chenna into a soft, cohesive dough. You’ll notice a visible change in texture—it will go from crumbly and grainy to smooth and creamy. It generally takes about 4 to 5 minutes to complete this step.
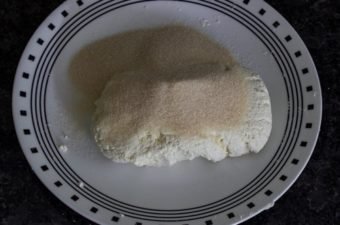
3) Add Sugar to the Kneaded Chenna
Once the chenna is smooth, sprinkle in the sugar. Use fine powdered sugar for best results, or pulse regular sugar in a grinder if it’s too coarse. A finer texture helps it mix seamlessly into the dough. Adjust the amount based on your taste preferences and the quantity of chenna you have.
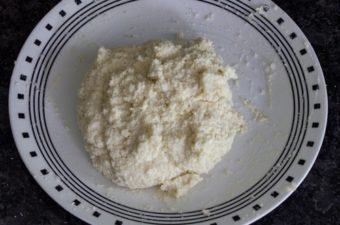
4) Knead Again to Incorporate Sugar Fully
Next, knead the chenna and sugar mixture for a few more minutes until the sugar blends in completely and the texture turns smooth. The mixture may feel slightly sticky due to the sugar melting with the moisture in the chenna, but that’s expected. Ensure there are no visible grains or chunks left—it should be smooth throughout. If preferred, you can also do this kneading step in a food processor using the pulse setting for convenience.
5) Begin Cooking the Mixture Gently
Place the chenna and sugar mixture into a non-stick or thick-bottomed pan for cooking. Set the heat to low or medium-low and start cooking. Keep stirring the mixture constantly with a spatula to avoid it sticking or burning. The goal is to lightly cook it, just enough to eliminate the raw milk taste without changing its color.
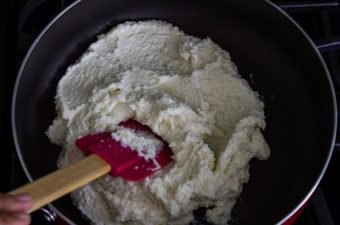
6) Cook for Just 4–5 Minutes—No Longer
This is a critical step. Limit the cooking time to just 4 to 5 minutes to avoid overcooking. You’re looking to lightly dehydrate the dough and cook off the raw smell of chenna, not to change its color or texture. Overcooking will cause the mixture to become dry and crumbly, which is undesirable. Stop cooking as soon as the mixture thickens slightly and begins to leave the sides of the pan.

7) Spread and Let It Cool to Warm
Remove the cooked mixture from the pan and transfer it back to a clean plate. Spread it out evenly to cool it down quickly. Allow it to rest until it’s warm, not hot, to the touch. This resting stage is important before the final knead and shaping.
8) Knead Again for a Silky, Pliable Dough
Once the mixture has cooled to a warm temperature, knead it one final time. This should take just a couple of minutes. The mixture will now feel very smooth, soft, and moldable. This kneading helps regain elasticity and prepares the dough for shaping.
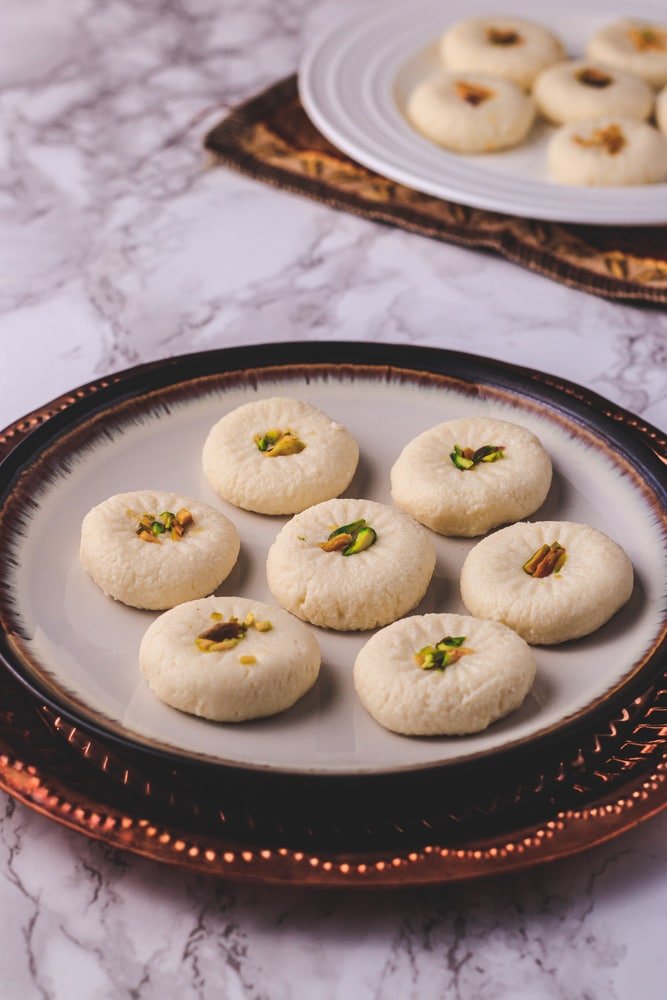
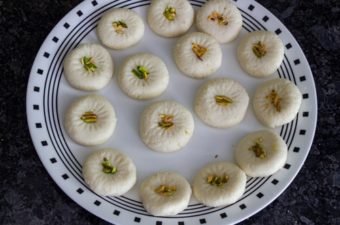
9) Shape the Sandesh
Pinch off small portions of the dough and shape them as desired. You can roll them into round balls, flatten them into peda-style discs, or use traditional Sandesh molds to create decorative designs. If you’re using molds, lightly grease them or dust with powdered sugar for easy release.

10) Garnish Creatively
Decorate the tops of your Sandesh with your choice of garnish. Classic options include chopped pistachios, slivered almonds, or a strand of saffron. You can also add a touch of cardamom powder, rose petals, or even mini chocolate chips for a fusion twist. Press the garnish lightly into the surface so it sticks well.
Expert Tips for Perfect Sandesh
- Choose full-fat milk for the best results—a higher fat content ensures rich, creamy chenna.
- Rinse the chenna well under cold water to wash away any lemon or vinegar flavor and avoid a tangy aftertaste.
- Cook the mixture briefly—just enough to remove the raw smell without drying it out.
- Use fresh, homemade chenna instead of store-bought paneer, which lacks the required softness.
- Experiment with flavors by adding rose water, cardamom powder, or a splash of saffron-infused milk for an aromatic twist.
