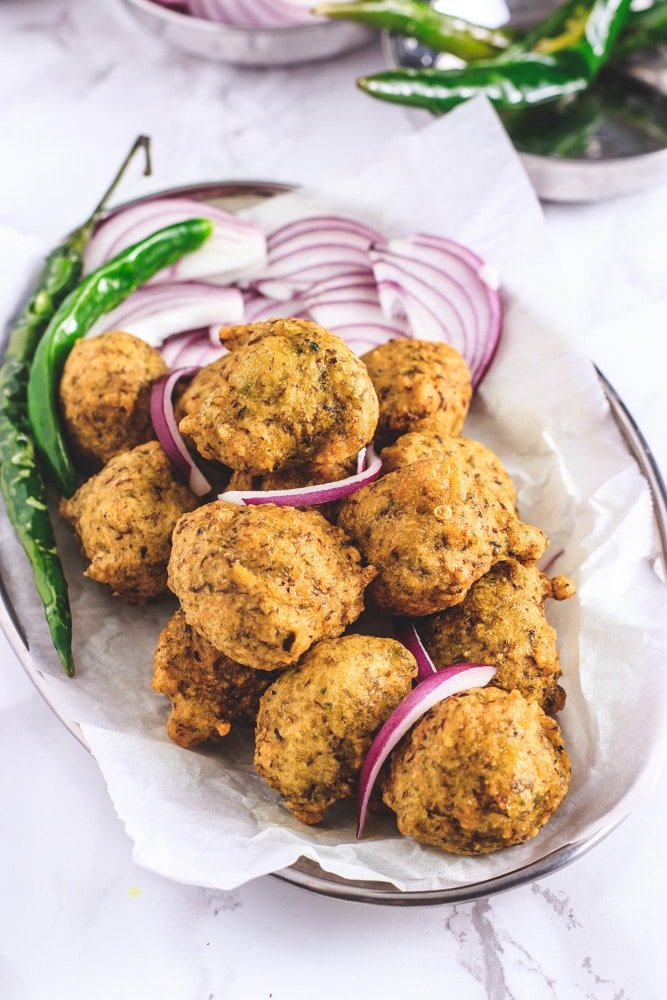
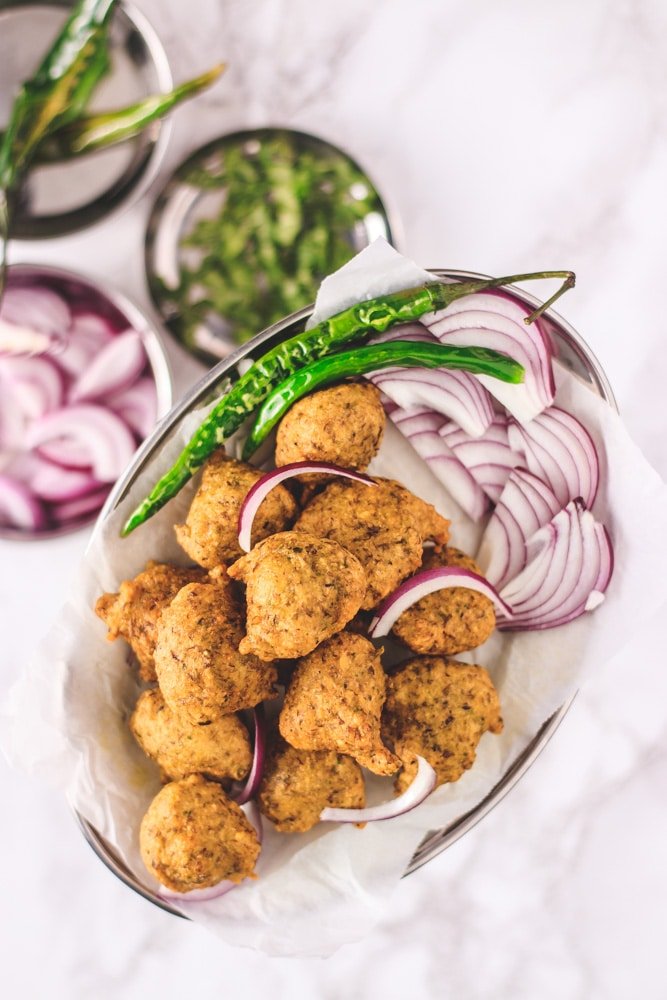
When it comes to comfort snacks that perfectly balance flavor and texture, Moong Dal Vada stands out as one of the most beloved treats, especially in Gujarati cuisine. These vadas are a culinary masterpiece—golden and crispy on the outside, yet irresistibly soft, spongy, and fluffy on the inside. Their wonderful combination of textures turns each bite into a truly enjoyable moment.
What makes Gujarati Moong Dal Vada truly special is not just the taste but the simplicity behind it. With just a handful of wholesome ingredients, you can create this snack right in your own kitchen without any hassle. The main ingredient, split yellow moong dal, is soaked and ground to a perfect coarse batter, seasoned carefully with aromatic spices, and then deep-fried to perfection. The result is a batch of vadas that are light yet packed with flavor, making them an ideal snack for any time of the day.
Traditionally, these vadas are cherished as a quintessential rainy season snack in Gujarat. Imagine enjoying piping hot Moong Dal Vadas, served alongside tangy sliced onions and fiery fried green chilies, while sipping on a steaming cup of chai. This combination not only elevates the taste but also warms the soul on a chilly, drizzly evening.
More than just a comforting snack, Moong Dal Vadas serve as a fantastic appetizer for parties, festive occasions, and casual meet-ups. Their universal appeal, ease of preparation, and delicious taste make them a crowd favorite. Whether you’re hosting a party or simply craving a tasty bite, these vadas promise to satisfy your hunger and delight your taste buds with every crispy, melt-in-the-mouth morsel.
In essence, Moong Dal Vada is more than just a snack—it’s a celebration of flavors, textures, and tradition, wrapped in a golden, crispy shell. So next time you want to treat yourself or impress your guests with a classic yet easy-to-make snack, remember this Gujarati gem. It’s truly the best, and once you try it, you’ll keep coming back for more!
About This Dal Vada Recipe
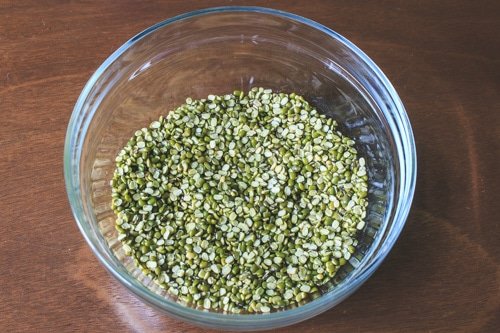
These tasty vadas are traditionally prepared using chilka moong dal, which is moong dal with its green skin still intact. This small but important detail gives the vadas a unique flavor and texture, distinguishing them from the more familiar moong dal pakoda, which is made from yellow moong dal that has had the skin removed. The green skin adds a subtle earthiness and a slight crunch that makes these vadas stand out.
A standout feature of these moong dal vadas is their wonderful texture—crunchy on the outside yet tender and airy on the inside. This ideal balance of crispiness and softness makes each bite deeply satisfying, offering a snack that feels both comforting and light.
These vadas are incredibly versatile and suitable for various occasions. Whether you are looking to entertain guests, satisfy those rainy day cravings, or simply want a delicious snack any time of the day, these moong dal vadas fit the bill perfectly. They are simple to make yet impressive in taste.
Another great advantage of these vadas is that they are vegan and gluten-free, provided you prepare them without hing (asafoetida). This makes them an excellent option for people following plant-based or gluten-free diets without compromising on flavor.
Ingredients
- 1 cup Chilkewali Moong Dal: This refers to moong dal with its outer green skin intact, which adds a slight earthy flavor and extra fiber. It’s important to rinse it thoroughly before soaking to remove any dust or impurities.
- Water for Soaking: Use enough clean, fresh water to fully submerge the moong dal. Soaking softens the dal, making it easier to grind and results in a smoother batter.
- 2 to 3 Fresh Green Chilies: Select fresh, vibrant green chilies for a good balance of heat and flavor. You can modify the amount according to how spicy you like it.
- A Small Piece of Fresh Ginger (about ½ inch): Fresh ginger adds a subtle warmth and depth to the dish. Peel and roughly chop it before grinding.
- 2 Tablespoons Fresh Cilantro (Coriander) Leaves: Use freshly chopped cilantro leaves for a bright, herbaceous note. It adds a fresh, vibrant fragrance and lifts the overall flavor of the dish.
- 2 Tablespoons Water for Grinding: Add this water while grinding the soaked dal and spices to help create a smooth, consistent batter.
- Salt to Taste: Adjust salt according to your preference to enhance the flavors.
- ¼ Teaspoon Asafoetida (Hing): Asafoetida is a potent spice that adds a unique umami flavor and aids digestion. Use sparingly due to its strong aroma.
- Oil for Deep Frying: Choose a neutral-flavored oil with a high smoke point (such as vegetable or sunflower oil) to ensure crisp frying.
- Thinly Sliced Red Onion (to Serve on the Side): Fresh, thin slices of red onion provide a crunchy, slightly pungent contrast to the fried dal preparation.
- Slit and Deep Fried Green Chilies (to Serve on the Side): These chilies add an extra spicy kick and crispy texture when served alongside.
How To Make Gujarati Dalwada?
1) Measure and Wash the Moong Dal with Skin (Chilka Moong Dal):
Begin by taking the required quantity of moong dal with its outer skin intact, known as chilka moong dal. Transfer it into a fine-mesh colander or strainer. Rinse thoroughly under cold running water until the water runs clear, ensuring all dust and impurities are removed. Then, place the dal in a bowl and rinse it 3 to 4 times, or continue rinsing until the water is completely clear and free from cloudiness.
2) Soak the Dal Properly:
Pour enough fresh water into the bowl to cover the dal by at least 2 to 3 inches. Let the dal soak at room temperature for about 4 to 5 hours. This soaking process softens the dal, making it easier to remove the skin and grind later.

3) Remove the Dal Skins by Rubbing:
Once the soaking is complete, gently take handfuls of the dal and rub them between your palms or fingers. This rubbing action helps loosen and remove the majority of the outer skins from the dal.
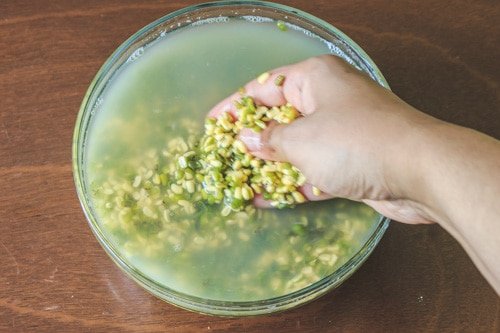
4) Continue Rubbing to Remove Most Skins:
Keep massaging the dal between your fingers, aiming to peel off about 70% of the skins. This step is essential for achieving the right texture for the batter.
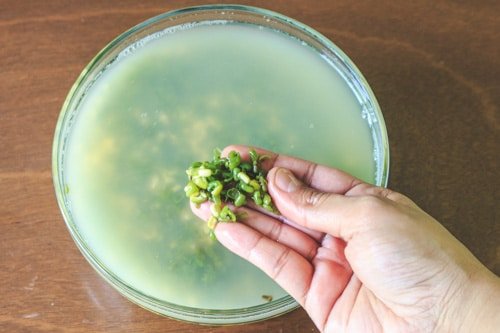
5) Drain and Separate the Skins:
After rubbing, pour the contents into a strainer to drain the water. You’ll see the loosened skins rising to the top of the water—carefully remove and discard them.

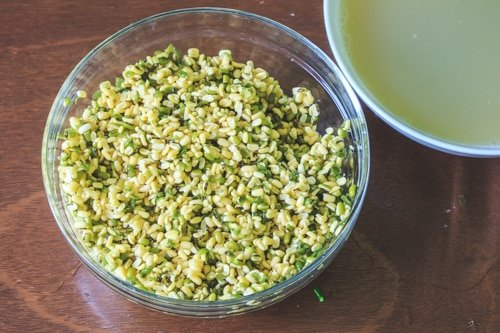
6) Check the Dal for Remaining Skins:
At this point, you should see that most of the dal is free from skins, with only a few pieces still retaining some outer layer.
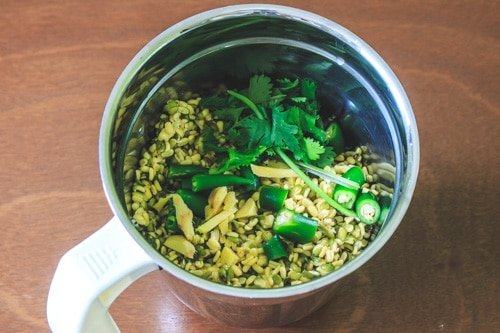
7) Prepare for Grinding:
Transfer the drained dal into a grinder or blender jar. Add the green chilies, peeled and roughly chopped ginger, and fresh cilantro leaves. Pour in 1 to 2 tablespoons of water to help the grinding process.
Note: If you don’t have a traditional Indian wet grinder (like a Preethi grinder), a regular food processor or blender will work fine.
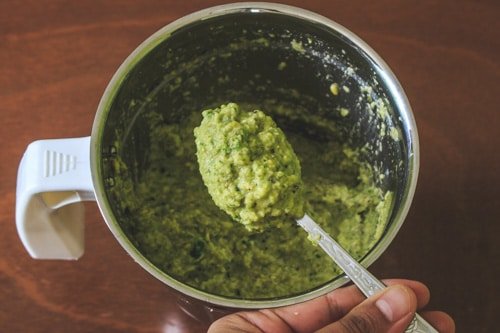
8) Grind into a Thick, Coarse Paste:
Pulse or grind the mixture until you achieve a thick, slightly coarse paste. Avoid over-processing; some texture in the batter helps create the desired crispiness.
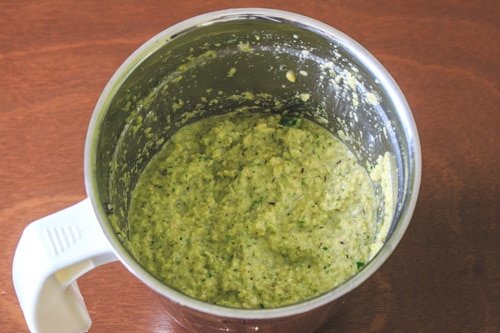
9) Be Careful with Water Quantity:
Keep in mind not to add too much water during grinding. The batter should be thick enough to hold shape when frying, not runny or watery.
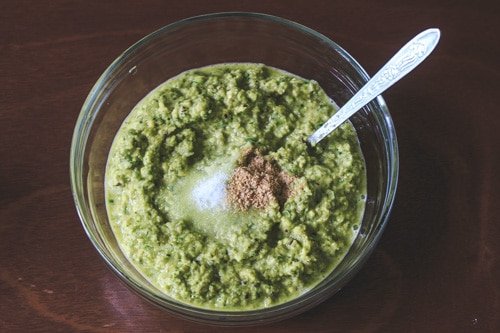
10) Transfer and Season the Batter:
Pour the ground batter into a mixing bowl. Add salt according to your taste and a pinch of hing (asafoetida) to enhance the flavor and aid digestion.
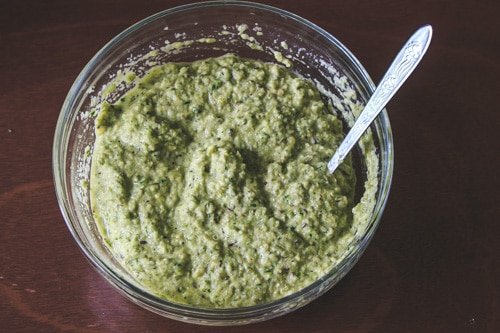
11) Whip the Batter Thoroughly:
Using a spoon or spatula, mix and beat the batter vigorously. This aeration lightens the batter, making it fluffy. This process is crucial for achieving soft and airy dal vadas without the need for any baking soda or other leavening agents.
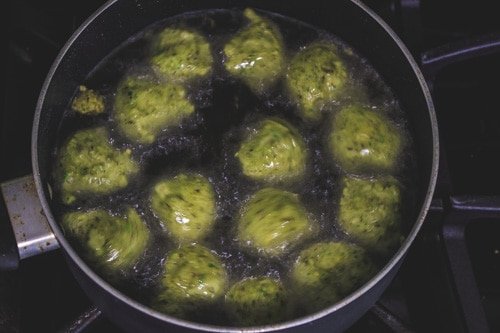
12) Heat Oil for Deep Frying:
While stirring the batter, start heating oil in a deep frying pan over medium heat. Heat the oil until it’s sufficiently hot for frying, but avoid letting it reach the smoking point.
13) Fry the Dal Vadas:
Using a large spoon or wet hands, take small portions of the batter and carefully drop them into the hot oil. Fry the vadas, turning them occasionally, until they become crisp and develop an even golden-brown color on all sides.
14) Drain Excess Oil:
Remove the fried vadas with a slotted spoon and place them on a plate lined with paper towels to absorb any excess oil.

15) Repeat the Process:
Keep frying the rest of the batter in small portions, making sure the oil stays at a steady temperature for uniform cooking.
Expert Tips To Make The BEST Dal Vada
- Soaking Time:
- Make sure to soak the dal for at least 4 hours at room temperature to ensure it softens properly. This step is essential and should not be rushed, as it softens the lentils and makes the grinding process easier while also enhancing the texture of the final vadas.
- Want to Skip the Rubbing and Skin Removal Process?
- If you’d like to avoid the time-consuming step of rubbing and peeling off the skins manually, try using a mix of lentils instead. Combine half the quantity of yellow moong dal (which comes without skin) with half the amount of green moong dal (with skin). This blend helps maintain the texture and nutrition while simplifying preparation.
- Batter Consistency: The batter should be thick with a slightly grainy texture, rather than smooth or runny. To achieve this, only add 1 to 2 tablespoons of water during grinding. Use the pulse or grind-in-intervals mode rather than continuous blending, as this helps retain a slightly grainy consistency that gives a better crunch and bite.
- Whisking the Batter: After preparing the batter, beat or whisk it vigorously for 2 to 3 minutes to incorporate air. This aerates the mixture, incorporating air and making it lighter. As a result, the vadas turn out soft and fluffy on the inside, without needing to use any leavening agents like baking soda.
- Optional Flavor Boost: For an extra punch of flavor, consider adding 2 to 3 garlic cloves while grinding the dal. This gives a mild garlicky undertone and enhances the overall taste of the vadas, especially if you enjoy bold, savory flavors.