
Khatta Dhokla, also known as Safed Dhokla, is a beloved Gujarati delicacy made by fermenting a batter of soaked rice and split urad dal (black gram without skin), then steaming it to perfection. This soft, spongy, and slightly tangy snack is traditionally enjoyed for breakfast or as a light evening meal, often served with green chutney and a drizzle of oil or ghee.
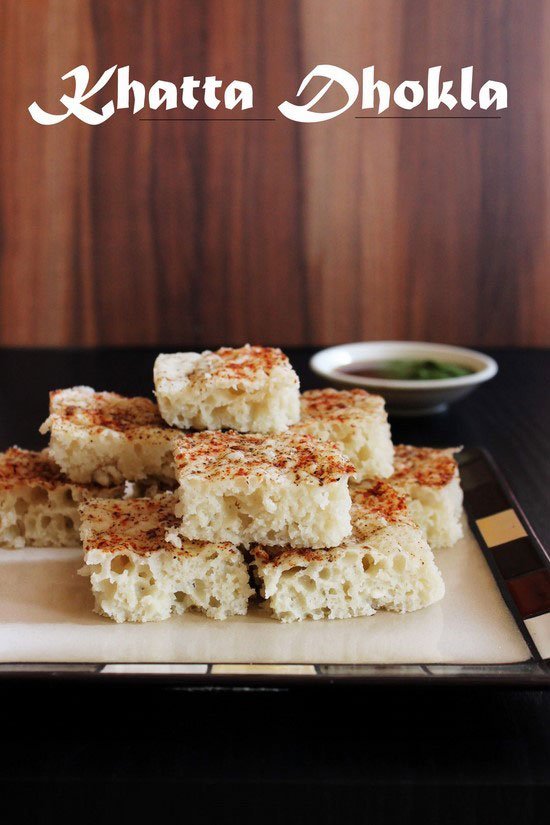
In different parts of Gujarat, this dish goes by other names like Idada or Idra, but the core preparation remains largely the same. What makes khatta dhokla special is its distinct white color and mildly sour taste, both of which come from the natural fermentation of the batter. The word “khatta” means sour, referring to the pleasantly tangy flavor that develops after resting the batter overnight or for several hours.
This version is commonly called white dhokla or safed dhokla to distinguish it from the more vibrant yellow dhokla, which is made using gram flour (besan) or chana dal. While yellow dhokla is spongy and slightly sweet, khatta dhokla has a firmer texture with a refreshing tang, offering a completely different taste experience.
Steaming rather than frying keeps this dish light and healthy, making it an excellent option for those looking for wholesome yet flavorful Indian snacks. Whether served plain, topped with a tempering of mustard seeds and sesame, or accompanied by chutneys, khatta dhokla is comfort food at its best—simple, nourishing, and packed with traditional flavors.
Ingredients
- ¾ cup long-grain rice or basmati rice: You can use any long-grain rice variety, but basmati works especially well as it gives a soft and fluffy texture after steaming. Wash and soak the rice for a few hours to prepare the batter.
- ¼ cup urad dal (split, skinless black gram): This lentil plays a key role in fermentation and helps achieve the light, airy texture that khatta dhokla is known for. Make sure it’s thoroughly rinsed and soaked with the rice before blending.
- ½ inch piece of fresh ginger: Ginger adds warmth and a subtle pungent flavor to balance the tang from the yogurt. It also helps in digestion and complements the fermented taste beautifully.
- 3 to 4 green chilies: Adjust the number of chilies based on your spice preference. They lend a mild heat that enhances the overall flavor of the otherwise simple batter.
- 3 tablespoons plain yogurt (dahi or curd), preferably sour: Key to fermentation, tangy yogurt not only helps the batter rise but also imparts the classic sour note that defines khatta dhokla. The more sour the curd, the better the flavor.
- 1 tablespoon oil: A little oil added to the batter ensures that the dhokla stays moist and soft after steaming. You can use any neutral-flavored oil like sunflower or groundnut.
- ¼ teaspoon baking soda: Just before steaming, baking soda is added to the fermented batter. It combines with the yogurt to create a leavening effect, helping the batter rise and resulting in a soft, airy texture in the dhokla.
Step-by-Step Instructions:
1) Rinse the rice and urad dal thoroughly:
Start by rinsing the rice and split urad dal under fresh water several times until the water appears clear. This step helps get rid of any surface starch and remaining impurities.
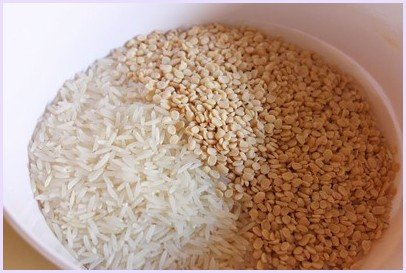
2) Soak both ingredients together:
Place the cleaned rice and urad dal into a bowl and pour in ample water to ensure they are fully submerged for proper soaking. Let them soak for 5 to 6 hours. This step softens the grains, making them easier to grind later.

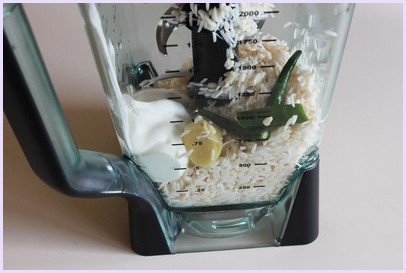
3) Grind the soaked mixture with flavoring:
After soaking, drain the excess water and place the rice-dal mixture in a grinder or blender. Add sour yogurt, ginger, and green chilies. Grind into a smooth, thick batter using minimal water—aim for a consistency similar to idli batter.
4) Transfer the batter and let it rest:
Pour the ground batter into a large mixing bowl. Cover it with a lid or plate and set it aside in a warm, draft-free spot for fermentation.
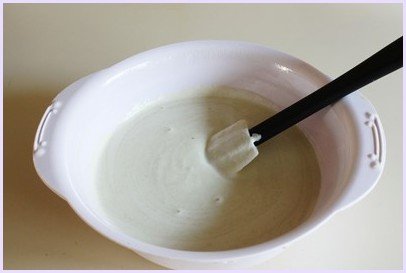
5) Allow the batter to ferment overnight:
Let the batter rest for 8 hours or overnight. During this time, natural fermentation will cause the batter to rise slightly and develop a pleasant, tangy aroma and flavor.
6) Prep the steamer and greased pan:
When you’re ready to steam, add water to your steamer and bring it to a boil. In the meantime, lightly coat a flat dish or pan with a generous amount of oil to prevent the dhokla from sticking. A 9-inch round cake tin with 1.5-inch sides works well for even cooking.
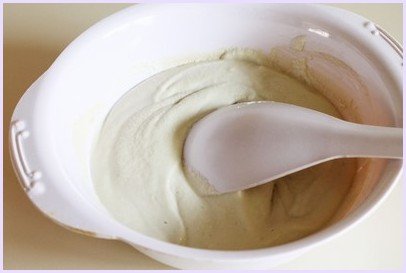
7) Mix in oil and salt:
After the batter has fermented, carefully mix in the oil and salt without deflating its light texture. Don’t overmix, as it may deflate the batter.

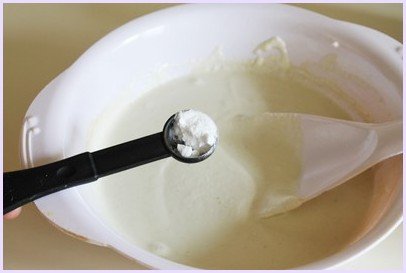
8) Add baking soda and mix quickly:
Just before steaming, sprinkle baking soda over the batter and give it a quick but gentle mix. You’ll notice the batter become light and airy.
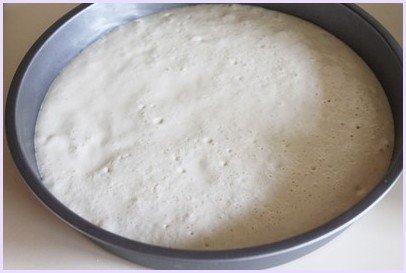
9) Pour the batter into the prepared pan:
Immediately transfer the activated batter into your greased pan, spreading it evenly.
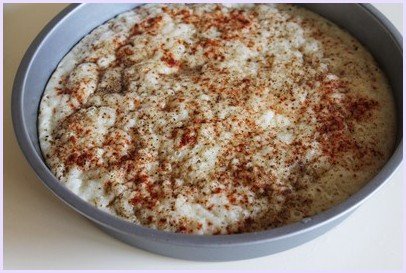
10) Sprinkle spice topping (optional):
For extra flavor and a beautiful finish, sprinkle a pinch of red chili powder, black pepper powder, and roasted cumin powder over the surface of the batter.

11) Steam the dhokla:
Place the pan in the steamer and steam on medium heat for about 10–12 minutes. To check doneness, insert a knife or toothpick into the center—it should come out clean.
12) Cool and slice:
Let the steamed dhokla cool in the pan for a couple of minutes. Then, cut it into squares or diamond-shaped pieces using a sharp knife.

13) Serve and enjoy:
Carefully lift the pieces out and transfer to a serving plate. Khatta dhokla is delicious on its own or paired with green chutney, garlic chutney, or a drizzle of tempered oil with mustard seeds and sesame.

Expert Tips for Perfect Khatta Dhokla
1. Use aged or sour yogurt:
The tanginess in khatta dhokla comes from proper fermentation, and sour yogurt plays a crucial role. If your curd isn’t tangy enough, you can add a few drops of lemon juice or let the batter ferment a little longer.
2. Ferment in a warm place:
Fermentation depends heavily on room temperature. In colder weather, keep the batter in a turned-off oven or wrap the bowl with a cloth and place it in a warm corner of the kitchen to encourage fermentation. Warm spot like a stovetop or in sunlight.
3. Don’t over-ferment:
While fermentation is key, leaving the batter out for too long can lead to an overly sour taste or a thin consistency. 8–10 hours is usually ideal, but adjust based on the weather.
4. Mix gently after fermentation:
After fermentation, gently fold in the salt and oil to maintain the airy texture of the batter. Vigorous mixing may knock out the air, resulting in a dense texture instead of a light, fluffy dhokla.
5. Add soda just before steaming:
Always add baking soda (or fruit salt like Eno) at the very last minute. It reacts immediately to create bubbles, so pour and steam the batter right away for best results.
6. Use a wide, shallow pan for steaming:
Using a broad and shallow pan helps the dhokla cook evenly and ensures soft, well-steamed pieces throughout. Avoid deep vessels as they may result in undercooked centers.
Serving Suggestions For Khatta Dhokla:
1. With green chutney:
Serve khatta dhokla with freshly made green chutney prepared from coriander, mint, green chilies, lemon juice, and a hint of garlic. The bold, zesty chutney adds a delicious contrast to the soft and subtly tangy flavor of the dhokla.
2. Drizzled with oil tempering:
A classic Gujarati touch is to pour a hot tempering of mustard seeds, sesame seeds, curry leaves, and a pinch of asafoetida over the steamed dhokla. This not only adds flavor but also keeps the dhokla moist.
3. With garlic chutney:
In some parts of Gujarat, especially in Kathiyawad, khatta dhokla is served with a spicy garlic chutney made with red chilies and garlic. It’s a bold combination, perfect for spice lovers.
4. With tea or buttermilk:
Serve khatta dhokla as a breakfast or light evening snack alongside masala chai or chilled chaas (spiced buttermilk). It’s filling yet light and satisfying.

Variations to Try
1. Add vegetables to enhance nutrition:
To make your dhokla more nutritious and flavorful, consider mixing in finely chopped leafy greens like spinach or fenugreek (methi) leaves. You can also add grated vegetables such as bottle gourd (lauki), zucchini, or even carrots. These additions blend well into the batter and introduce a subtle texture without overpowering the traditional flavor. Just make sure to squeeze out excess moisture from watery veggies before mixing to maintain the ideal batter consistency.
2. Instant no-ferment version:
If you’re pressed for time or forgot to soak and ferment the batter in advance, try this quick alternative. Combine semolina (rava), sour yogurt, and a little water to make a smooth batter. Stir in Eno fruit salt or baking soda right before steaming to help the batter rise and become light and fluffy. Although it won’t develop the deep tangy flavor that comes from fermentation, this version still results in soft, fluffy dhokla that can be ready in under 30 minutes—perfect for a last-minute breakfast or tea-time snack.
3. Tempering with coconut and green chilies:
Give your traditional khatta dhokla a festive and flavorful twist with a South Indian-style tadka. Heat oil and add mustard seeds, curry leaves, slit green chilies, and a pinch of asafoetida. Once the tempering sizzles, pour it evenly over the steamed dhokla, then sprinkle freshly grated coconut on top. This not only adds visual appeal but also lends a wonderful layer of flavor and texture, making it ideal for serving guests during special occasions or festivals.