
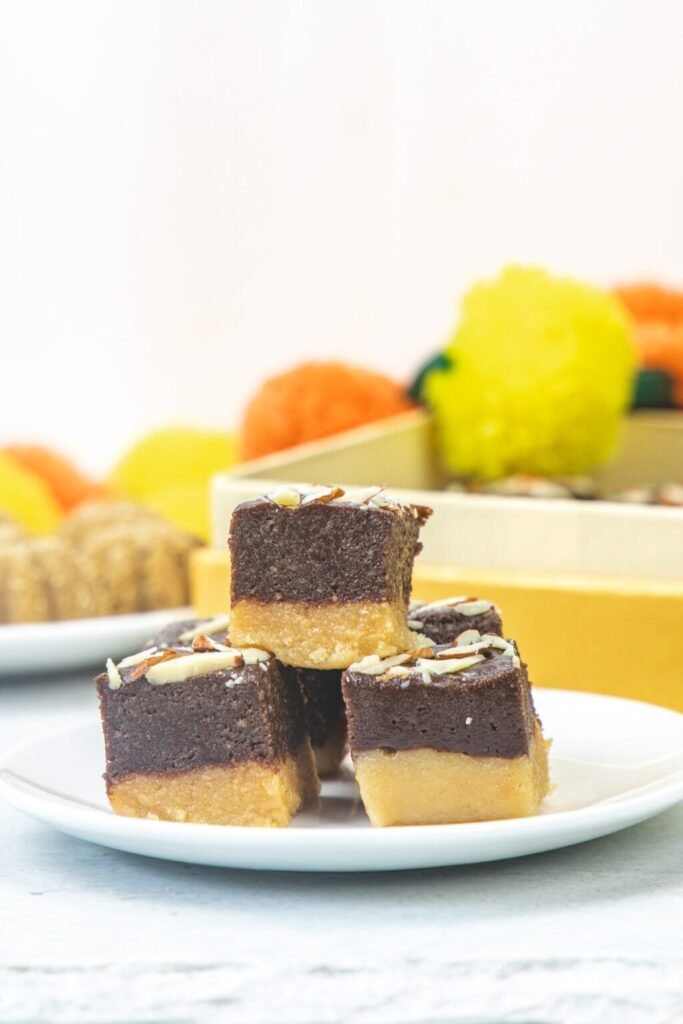
Especially during the festive season of Diwali, Chocolate Burfi emerges as a delightful and indulgent sweet treat that everyone enjoys. Not only does it boast rich festive flavors, but it also features two distinct layers—one rich and creamy chocolate layer, and the other a smooth, traditional milk-based layer. What’s more, this recipe stands out for its simplicity; it requires only three basic ingredients, making it incredibly easy and quick to prepare at home. Moreover, it’s perfect for those who love combining classic Indian sweets with a chocolaty twist. As a result, this burfi is sure to impress your family and guests with its luxurious flavor and melt-in-the-mouth texture.
What Is Chocolate Burfi?
- Classic Burfi Base: Burfi is a rich, dense fudge-like sweet primarily made from milk-based ingredients such as khoya, condensed milk, or milk powder. In this recipe, cocoa powder is added to create a luscious chocolate flavor, giving it a delightful twist.
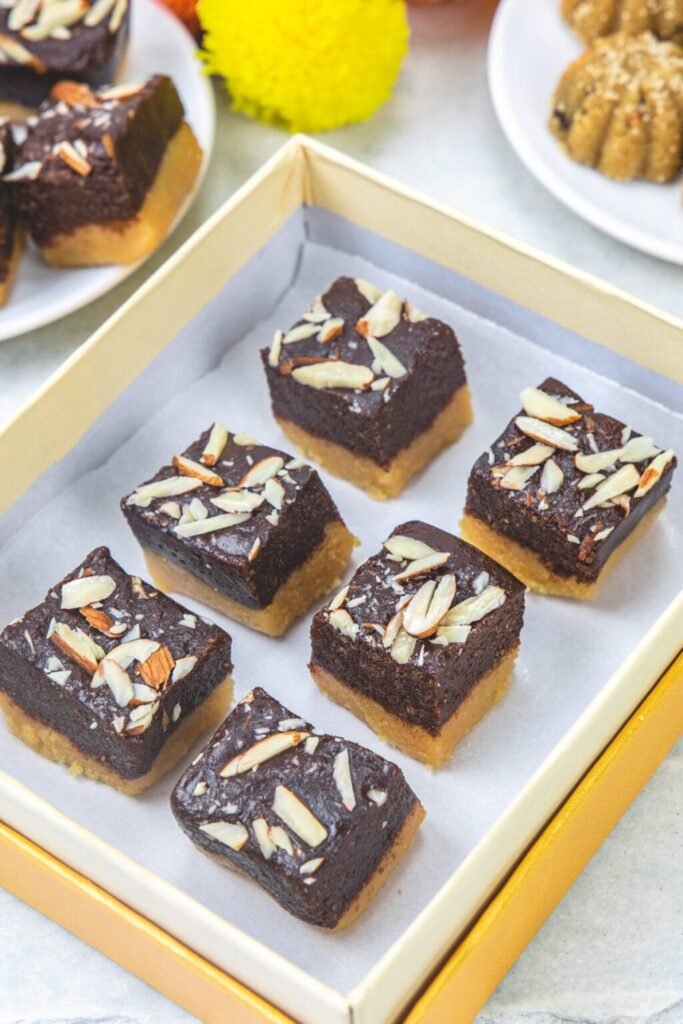
- Two Distinct Layers: This chocolate burfi features two beautiful layers that complement each other perfectly. The bottom layer is a traditional plain khoya burfi, smooth and creamy, while the top layer is infused with cocoa powder, creating a rich chocolate coating. To finish, it’s garnished with crunchy almond slivers, adding a lovely texture and enhancing the visual appeal.
- Quick and Easy Preparation: Ideal for busy festive days, this burfi recipe comes together in less than 30 minutes. It’s perfect when you have other Diwali preparations like cleaning, decorating, and making multiple snacks on your plate. Despite its simplicity, this recipe never compromises on taste or presentation.
- Loved by All Ages: This treat is a hit among kids and adults alike. The combination of the familiar milk-based burfi with a chocolaty layer makes it irresistible, especially to children who adore chocolate. It’s a great way to introduce traditional sweets with a modern twist that appeals to younger taste buds.
- Ideal for Festive Sweet Boxes: If you’re looking to prepare homemade sweets to fill your Diwali gift boxes, this two-layer chocolate burfi is an excellent choice. Its elegant look, combined with ease of preparation, makes it a crowd-pleaser. Try walnut barfi, magas, coconut barfi, or kopra pak for quick, delicious additions to your festive sweet platter.
Ingredient Notes
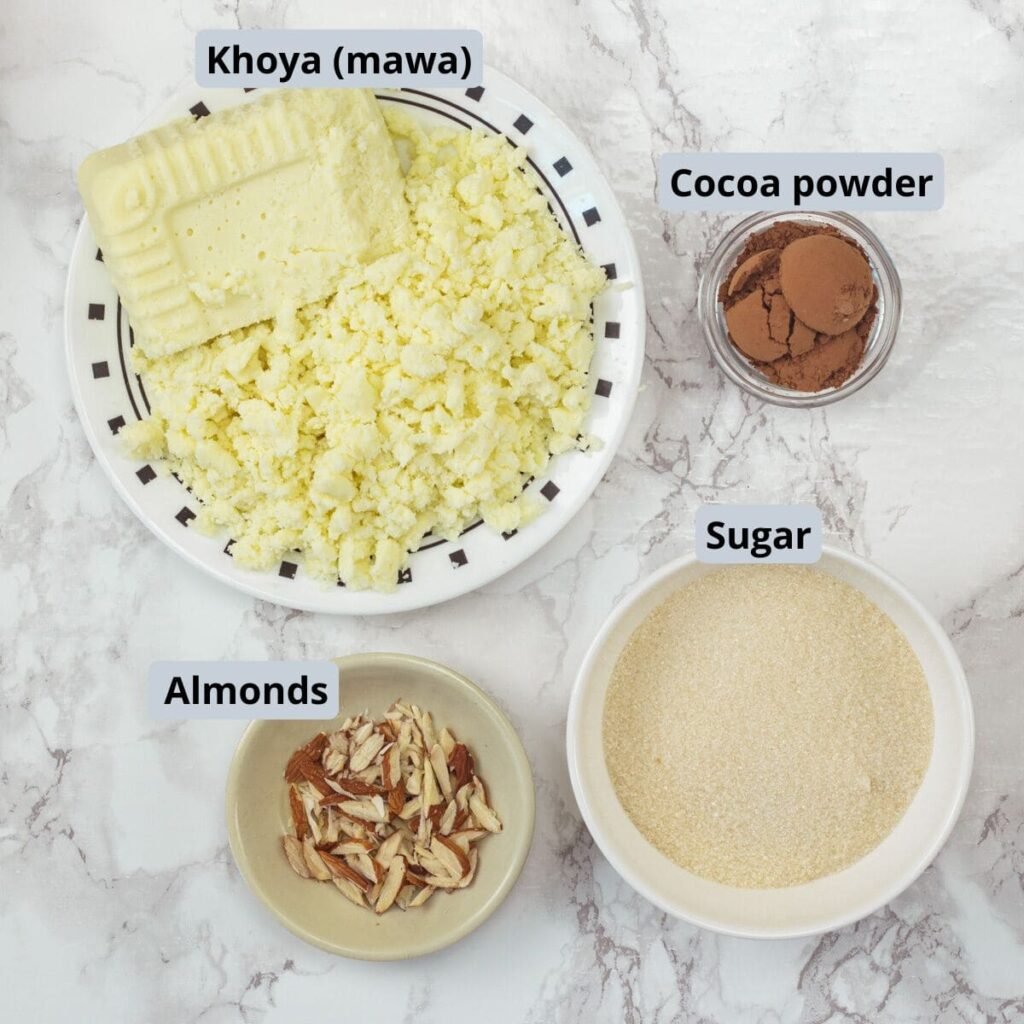
- Khoya (Mawa): I have used Vadilal brand khoya before, but it tends to have higher moisture content, which can make the burfi slightly softer than desired.
- For the best results, use pure homemade khoya as it has a firmer texture and richer flavor, helping the burfi set perfectly.
- Homemade khoya is made by simmering full-fat milk slowly until it thickens into a dense, creamy mass, giving you better control over moisture and texture.
- Cocoa Powder: Adds the rich chocolate flavor to the top layer of the burfi.
- Use good-quality unsweetened cocoa powder to get the best taste and deep color.
- Sugar: Sweetens the burfi and balances the bitterness of cocoa.
- Adjust the sweetness to your liking, but typically, granulated sugar works well.
- Almonds: Thinly sliced almonds are used as a garnish.
- They add a nice crunch and enhance the appearance of the burfi, making it look festive and appealing.
How To Make Chocolate Burfi?
Prep Step:
Begin by greasing a small square or rectangular tray, steel plate, or glass container with a thin layer of ghee. This prevents the burfi from sticking and makes demolding easier. Keep it aside so it’s prepared and ready to use once the burfi mixture is cooked.
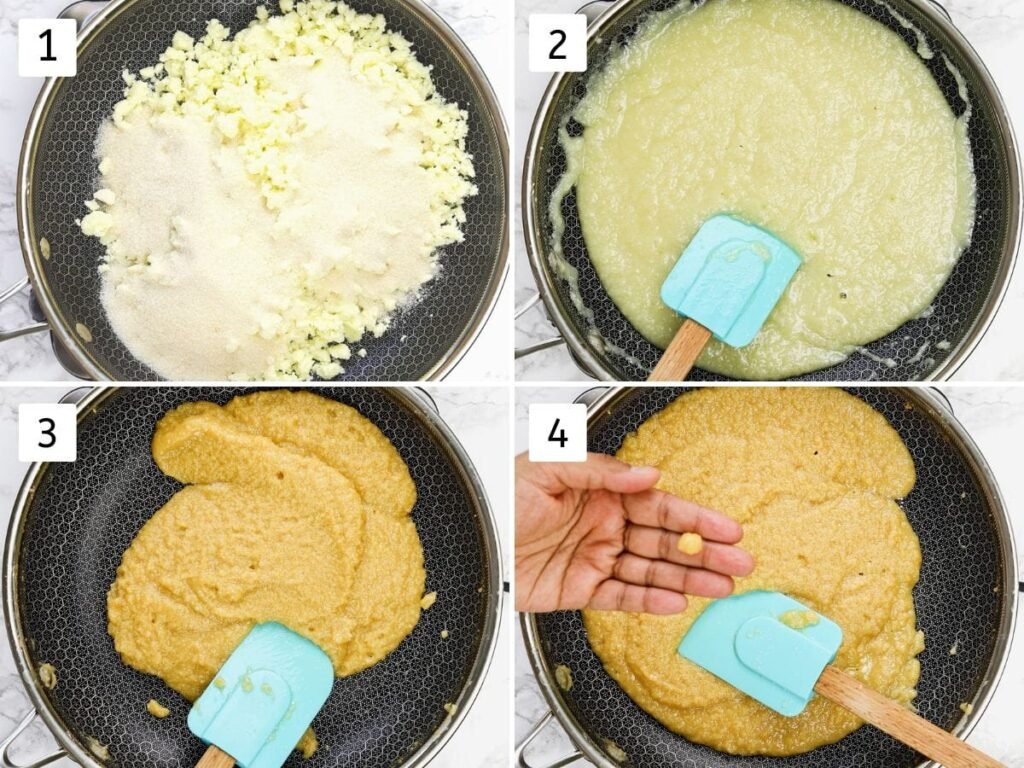
1) Combine Khoya and Sugar: Add crumbled khoya and granulated sugar to a non-stick or heavy-bottomed pan. Place it on medium heat.
2) Melt and Blend: As the mixture heats up, the khoya begins to melt and the sugar dissolves completely, forming a smooth, pourable consistency. Stir constantly to avoid any sticking or burning at the bottom of the pan.
3) Cook to Thicken: Keep cooking while stirring frequently. As the mixture simmers, it will slowly thicken as the excess moisture evaporates, leading to a rich and fudgy consistency ideal for setting the burfi. You might also observe a slight deepening of color depending on how long you cook it and the type of khoya used. This process may take around 5 to 15 minutes, depending on the moisture content of the khoya and the heat level used while cooking.
4) Check for Setting Consistency: To test if the mixture is ready, take a small portion and let it cool slightly. Try rolling it into a ball—if it’s smooth and non-sticky, it’s the right consistency. If it’s sticky or loose, cook for a few more minutes and check again.
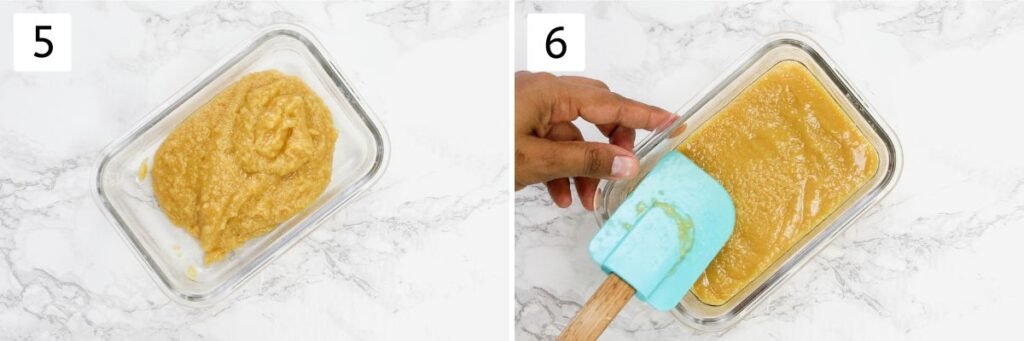
5) At this stage, once the desired texture is achieved, go ahead and pour half of the mixture into the greased tray to form the base layer.
6) Flatten Evenly: Quickly use a spatula or the back of a spoon to level and smooth out the surface, creating a uniform bottom layer. Set aside.
7) Add Cocoa Powder: Now, add the cocoa powder to the remaining half of the khoya mixture in the pan.
8) Mix Thoroughly: Stir continuously and blend until the cocoa powder is fully incorporated, forming a rich chocolate mixture.
9) Pour the Chocolate Layer: Gently pour the chocolate-infused mixture over the plain khoya layer in the prepared tray, ensuring an even spread without disturbing the bottom layer.
10) Spread Without Mixing: Gently spread the chocolate layer evenly using a clean spatula. Try not to press too hard, as the layers should remain distinct.
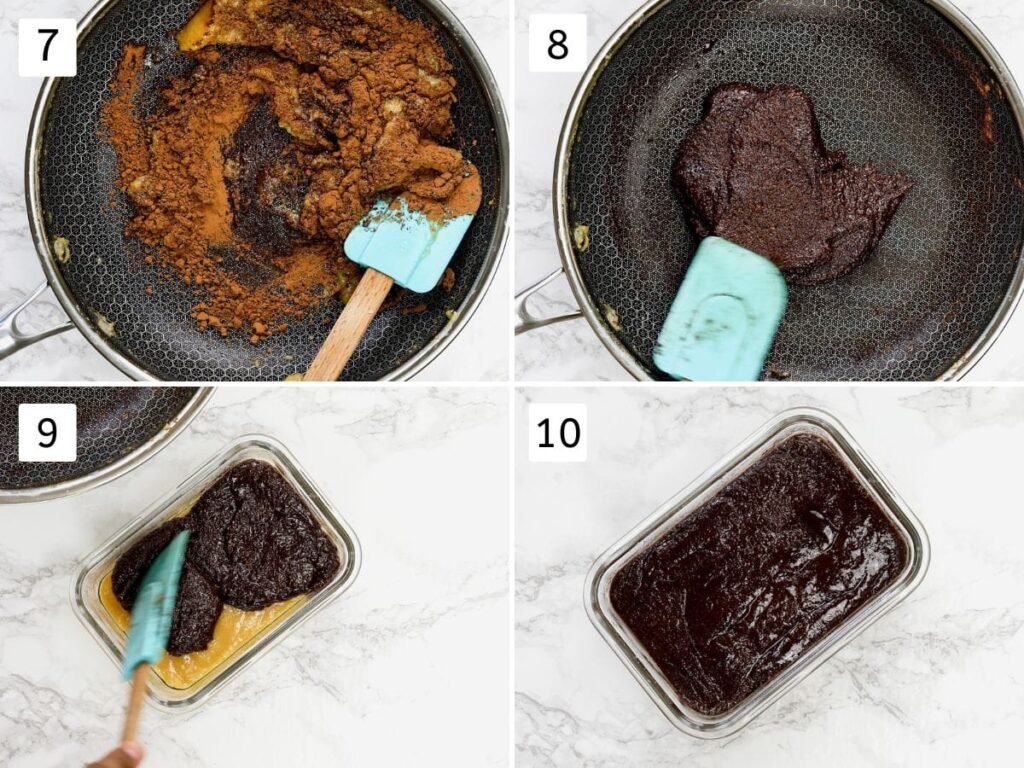
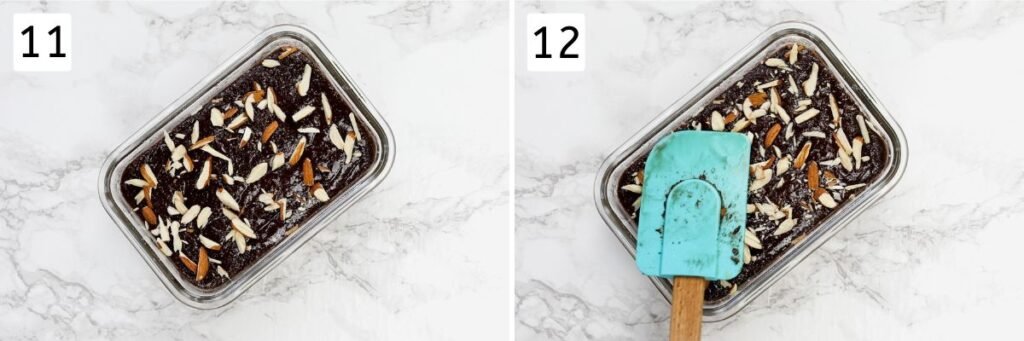
11) Garnish with Almonds: Sprinkle finely chopped or sliced almonds evenly over the top layer for added texture and a festive touch.
12) Press to Set Toppings: Use the back of a spoon or a spatula to press the almonds lightly into the surface so they stick well once set.
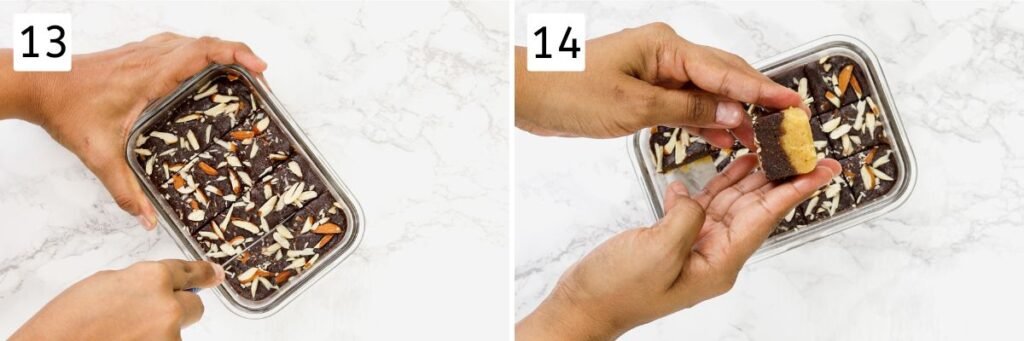
13) Let It Set: Allow the burfi to set at room temperature for a few hours—this could take 3 to 8 hours based on climate and moisture. For faster setting, place the tray in the refrigerator for an hour or two.
14) Cut and Serve: Once fully set and firm to touch, use a sharp knife to cut the burfi into neat squares or diamonds. Carefully lift them out and serve or store in an airtight container.
Expert Tips:
1. Use Cooking Time as a Flexible Guide:
The listed cooking time in recipes should be treated as an approximate guideline rather than an exact measure. It can vary based on several factors such as the type and size of the pan you’re using, the quantity of khoya and sugar mixture, and the quality or moisture content of the khoya. Keep a close eye on the mixture and rely more on texture cues than the clock.
2. Moisture Content of Khoya Matters:
If your khoya (mawa) has a higher moisture content, it will require additional cooking time to achieve the perfect thick consistency needed for setting the burfi properly. Homemade khoya typically has less moisture than some store-bought varieties, which speeds up the process.
3. How to Test for Setting Consistency:
To determine whether your mixture is ready to be set, take about ¼ teaspoon of the cooked mixture and drop it onto a plate. Let it cool for a minute or two. Then try rolling it between your fingers. If it forms a smooth, non-sticky ball, your mixture has reached the correct consistency. If the mixture is still sticky or too loose, continue cooking for a few more minutes and test again until it reaches the right consistency.
4. Avoid Overcooking:
Be cautious not to overcook the khoya mixture. Doing so can result in a chewy or rubbery texture, which takes away from the soft and melt-in-the-mouth quality that a perfect burfi should have.
5. Storage Tips for Freshness:
Store the cooled and cut chocolate burfi pieces in an airtight container in the refrigerator. They stay fresh and flavorful for up to 2 weeks when chilled. Consume within 1–2 days at room temperature due to mawa’s dairy content, especially in warm or humid weather conditions.
Variations of Chocolate Burfi:
1. Milk Powder Chocolate Burfi:
If khoya or mawa isn’t available, milk powder serves as a fantastic substitute to make chocolate burfi. To prepare the base, combine milk powder with a small amount of ghee and milk, mixing until it forms a smooth, lump-free consistency. Simmer the mixture while stirring continuously until it thickens into a smooth, dense consistency suitable for setting into burfi. Divide the mixture into two equal parts—keep one plain and mix cocoa powder into the other half. This shortcut method still gives you a rich and creamy texture, perfect for festive celebrations.
2. Coconut Chocolate Burfi:
For a tropical twist to the classic chocolate burfi, add desiccated coconut to the khoya layer. The mild sweetness and grainy texture of coconut pair wonderfully with chocolate. You can mix it into the bottom (plain) layer for contrast or sprinkle some on top for a decorative touch. This variation is particularly popular during Indian festivals like Diwali and Raksha Bandhan due to its unique flavor profile.
3. Nutty Chocolate Burfi:
To enhance the richness and provide a delightful crunch, add finely chopped dry fruits such as almonds, cashews, and pistachios directly into the khoya mixture. This nutty addition makes every bite more indulgent and gives a festive look and feel. You can also lightly roast the nuts in ghee before mixing them in for an added depth of flavor.
4. Layered Fusion Burfi:
Add a creative spin by introducing a third layer infused with exotic flavors like rose water, mango pulp, or saffron (kesar). These natural essences not only add color and fragrance but also make the burfi more visually appealing and gourmet. Use natural food colors or fruit extracts and layer them carefully for a vibrant, fusion-style sweet that’s perfect for gifting or serving to guests.