The Food Processor Pie Crust revolutionizes the way you prepare homemade crusts—effortlessly delivering perfect flakiness every time. This no-fuss method produces a rich, buttery, and melt-in-your-mouth crust in under five minutes. Thanks to the precision and speed of the food processor, the butter is evenly distributed and kept cold, resulting in tender, layered dough that’s ideal for both sweet and savory pies. Say goodbye to overworked dough and hello to bakery-style pie crusts made right in your kitchen.
❤️ You’ll Love This Food Processor Pie Crust
- Perfect Pie Crust Every Time: Discover the secret to making irresistibly flaky and buttery pie crusts with this foolproof food processor method—ideal for both beginners and seasoned bakers.
- Ditch the Store-Bought Crusts: Why settle for pre-made when you can create a fresher, tastier version at home? This homemade crust boasts premium ingredients with no artificial additives or preservatives.
- Effortless and Quick: Making pie dough has never been simpler. Thanks to the efficiency of the food processor, you’ll have a silky, perfectly blended dough prepped and ready for rolling in no time at all.
🧾 Ingredient Notes
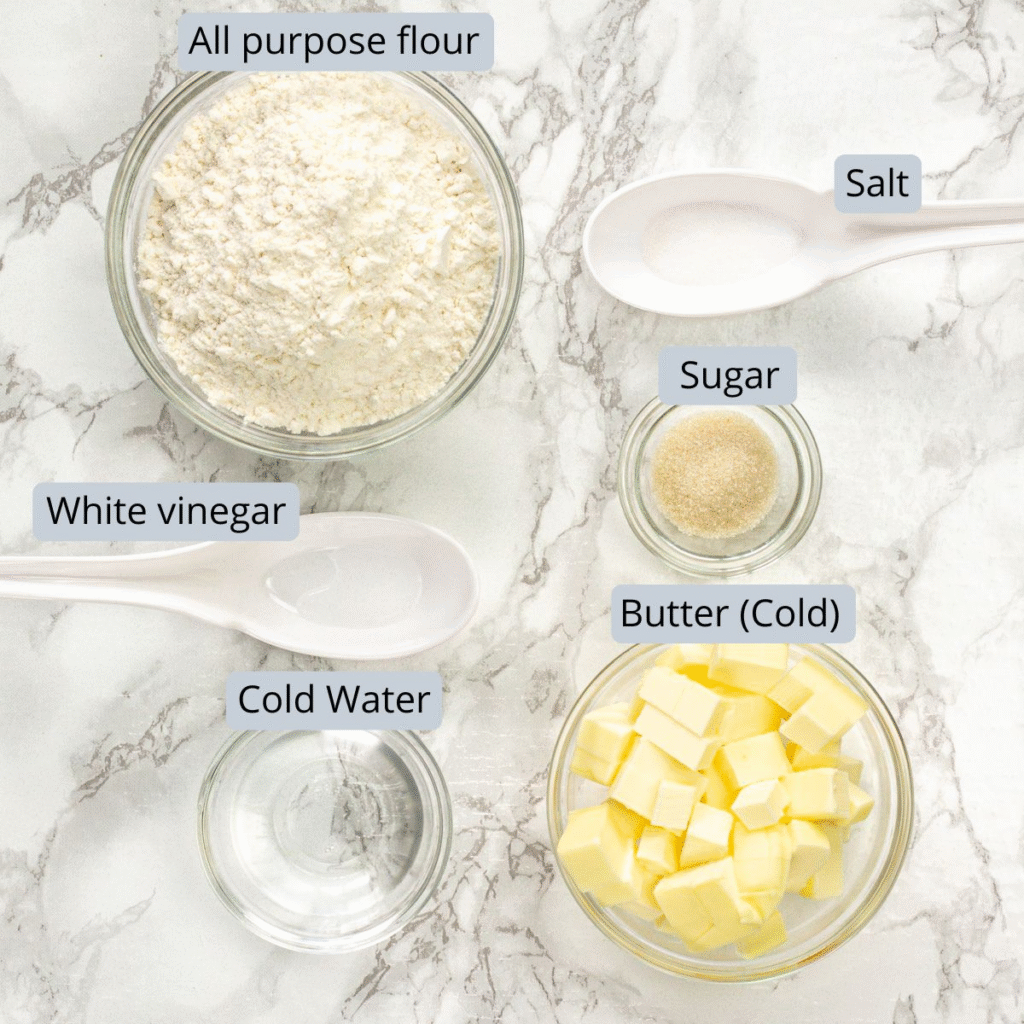
- All-Purpose Flour: This versatile flour forms the structural base of the pie crust. Its smooth, fine texture helps create a crust that’s crisp at the edges and tender inside once baked.
- Cold Unsalted Butter: This is the magic ingredient behind those irresistible flaky layers. When cold butter melts in the oven, it releases steam, creating tiny air pockets that give the crust its signature light, crisp texture. Using it cold is essential—when the dough hits the oven, the butter melts and releases steam, which forms light, airy layers in the crust.
- Vinegar: Just a splash of vinegar can work wonders. Cold Unsalted Butter: Not only does it create delicate, flaky layers by releasing steam as it melts, but it also slows gluten formation. This means your dough stays tender and easy to handle—no tough, rubbery crust here, just buttery perfection.
- Salt: Even a small amount of salt enhances the overall flavor of the crust, balancing the richness of the butter and complementing both sweet and savory fillings.
- Sugar: Sugar lends a gentle sweetness that rounds out the flavor of the crust, especially in fruit or dessert pies. It also aids in browning.
- Ice Water: Ice-cold water brings the dough together without warming the butter. Keeping the butter solid ensures those flaky pockets stay intact, resulting in a light, tender crust with just the right amount of structure. This temperature control is key—if the butter melts before baking, you lose the flaky texture. Cold water keeps everything cool and crisp.
👩🍳 How To Make Pie Dough In Food Processor? (Pics)
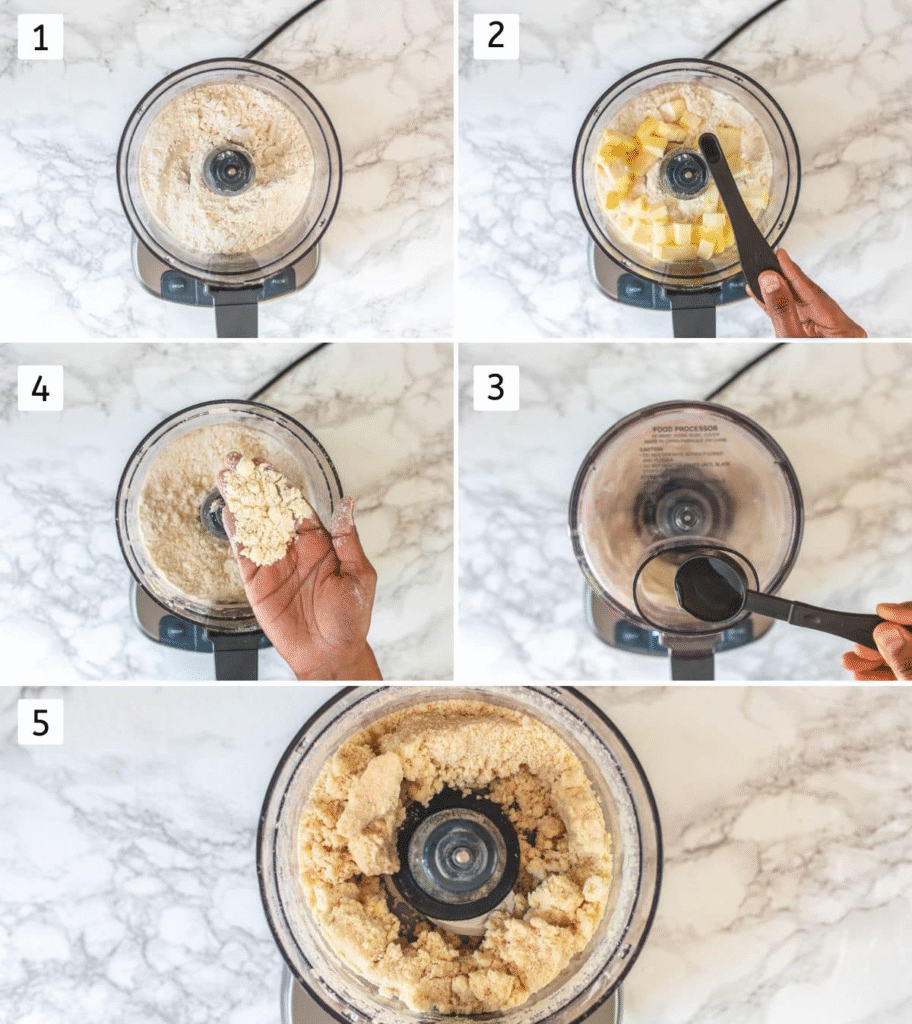
1) Begin by adding the all-purpose flour and a pinch of salt to your food processor. Let the blades pulse briefly to combine the dry ingredients evenly, creating the perfect base for your pie dough. Give it a few pulses—around 15 seconds—until the dry ingredients are well mixed. Let it sit for a moment with the lid closed to allow any airborne flour to settle before opening.
2) Next, add the cold, diced butter directly into the flour mixture. Gently drizzle the vinegar over the butter pieces, making sure it’s spread evenly to help tenderize the dough and enhance its flakiness.
3) Pulse the mixture 8 to 9 times, just until it resembles coarse crumbs. A few larger pieces of butter should remain—this is what gives the crust its flaky texture.
4) While the processor is running, slowly pour in two tablespoons of ice-cold water through the feed tube. Let it blend for around 30 seconds—just enough for the mixture to begin forming clumps. Be careful not to overmix; the dough should look rough and slightly crumbly, yet hold together when pressed.
5) The dough might not come together as one smooth ball in the processor, but when you pinch a bit between your fingers, it should hold its shape without crumbling. It should feel balanced—neither sticky nor dry.
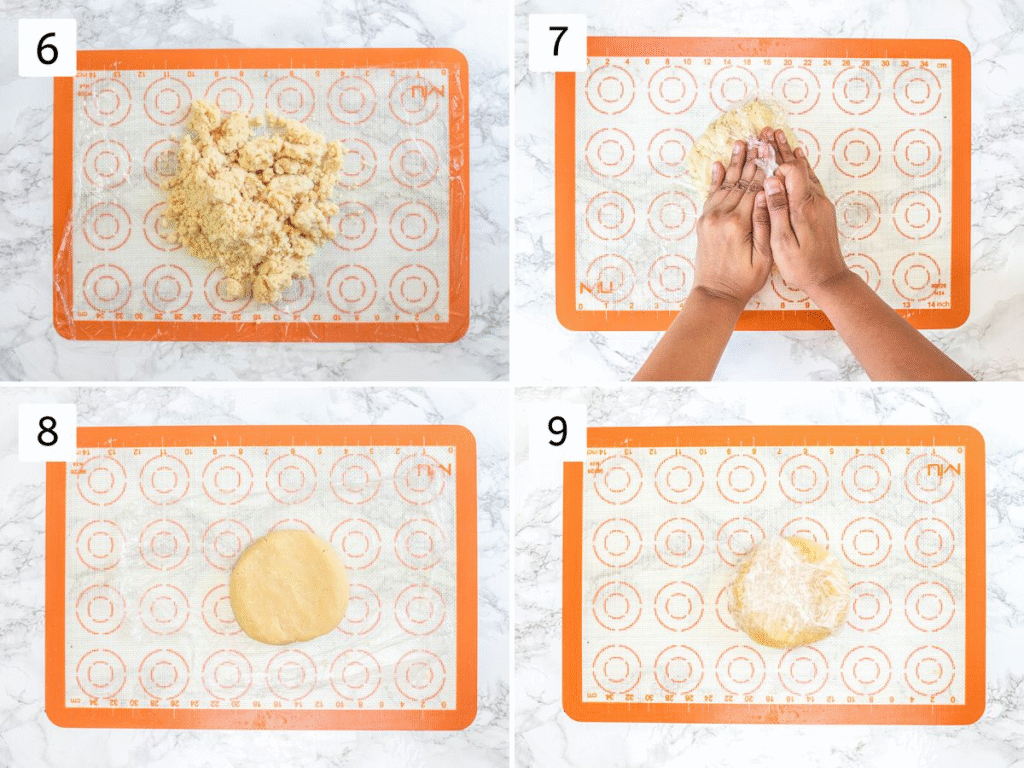
6) Lay a piece of plastic wrap on your counter and carefully transfer the loose dough mixture onto it.
7,8) Using your hands, gently bring the dough together, forming it into a rough ball. Press it down slightly to create a flat disc—this shape will chill more evenly and be easier to roll later.
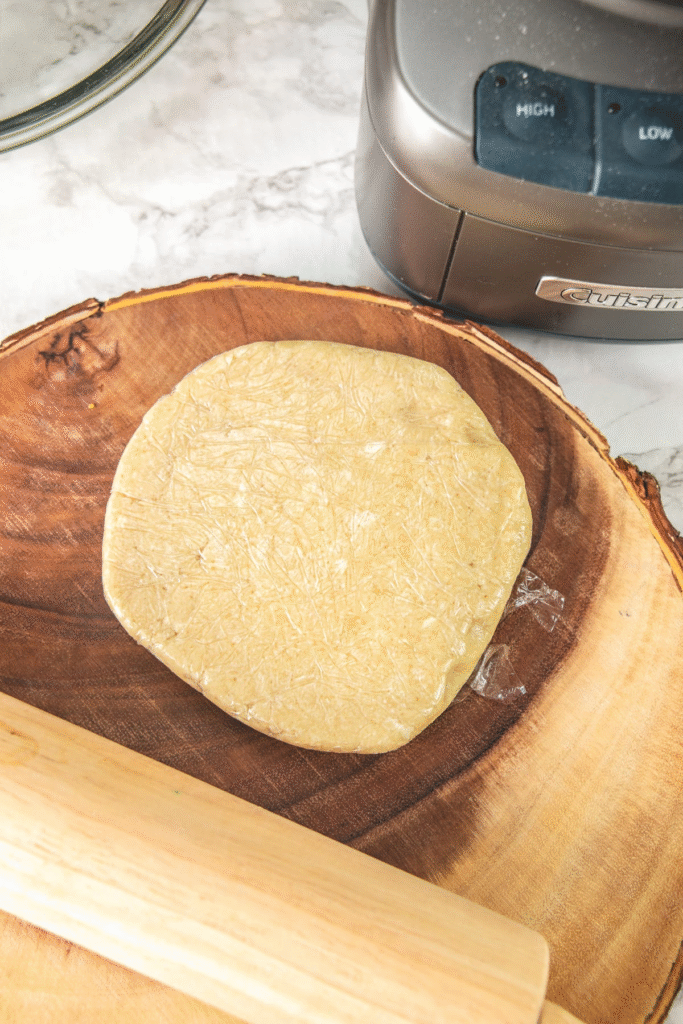
9) Tightly wrap the dough disc in plastic wrap, sealing in all the moisture. Pop it into the refrigerator and let it chill for 30 to 45 minutes—just enough time for it to firm up and become perfectly pliable for rolling into a beautiful pie crust.
👩🍳 Rolling Pie Crust (Step-By-Step Pics)
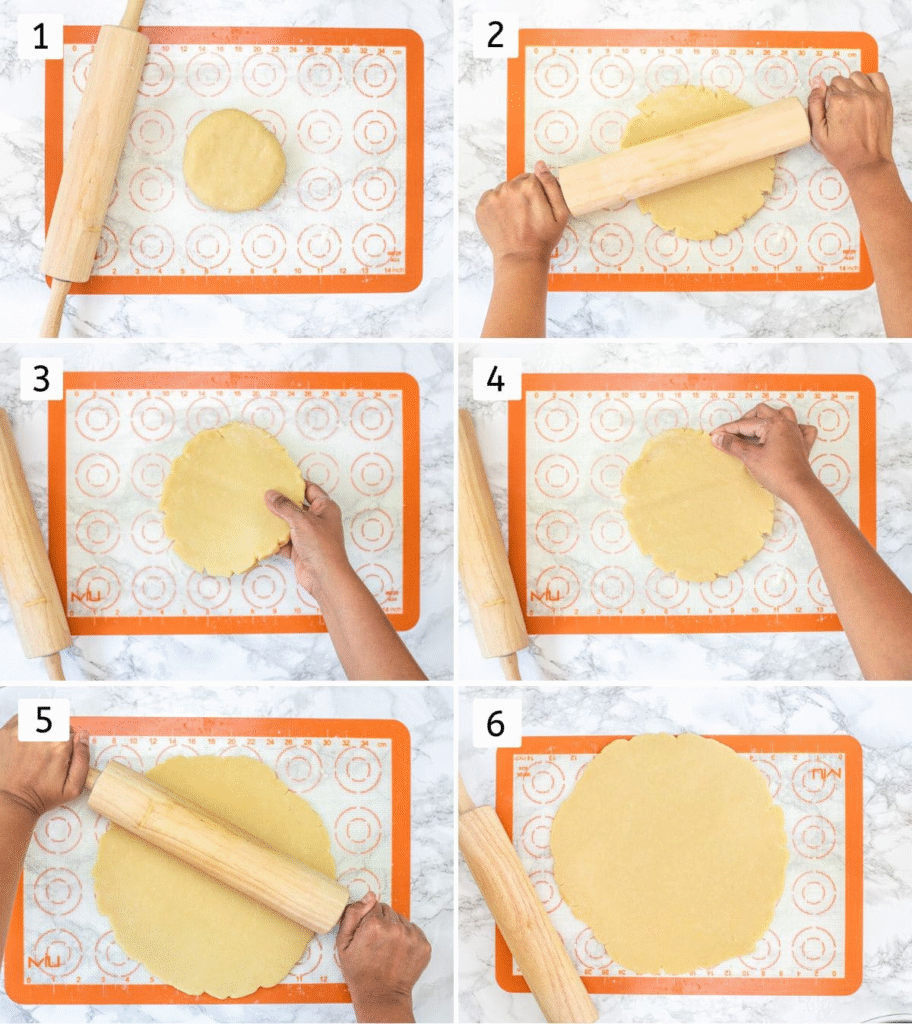
1) After chilling, take the dough out of the fridge and allow it to rest at room temperature for 5 minutes to slightly soften—this makes it easier to roll.
2) Dust your work surface and rolling pin with a light layer of flour. A silicone mat works great here to minimize sticking and make cleanup easier.
3) Gently roll out the dough, rotating it a quarter turn after every few rolls and adding a touch of flour as needed to avoid sticking.
4) As you roll, use your fingers to gently pinch and smooth any cracks that appear along the edges, keeping the dough intact and even.
5, 6) Keep rolling the dough out evenly, turning it frequently to maintain a round shape. As you go, use your fingers to gently press and patch up any cracks that appear along the edges. Aim for a round sheet approximately 12 inches wide and about ⅛ inch thick.
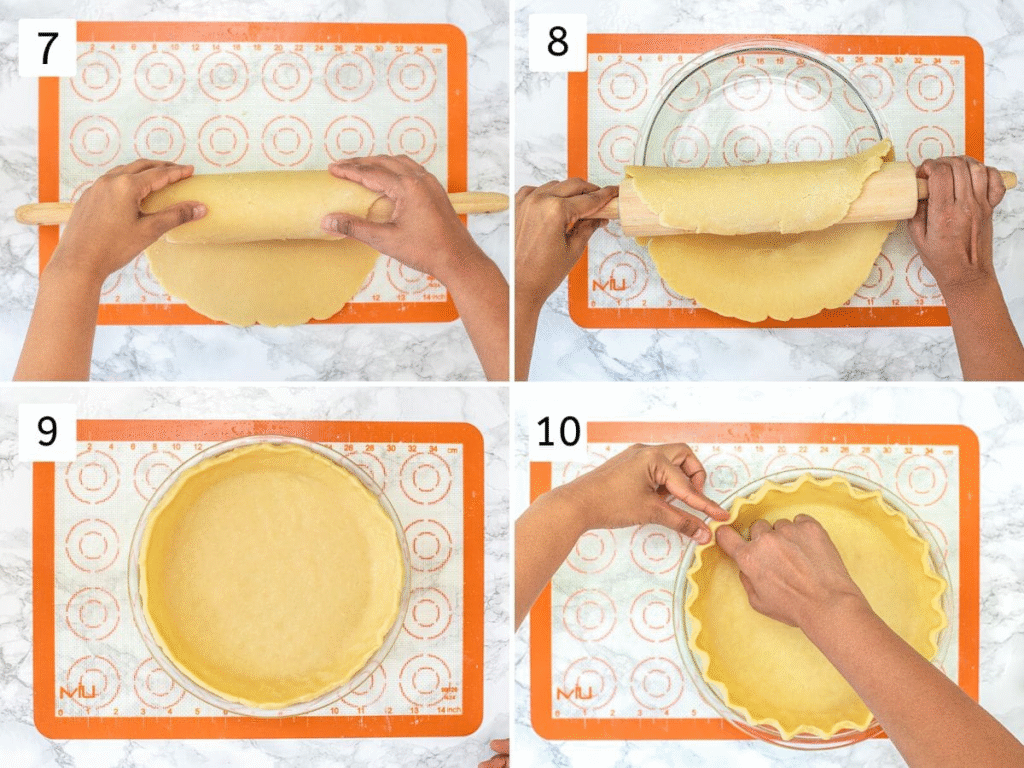
7) To transfer the dough, carefully wrap it around your rolling pin, then unroll it slowly and gently over a 9-inch pie dish, letting it settle into place.
8) Gently lower the dough into the pie dish, softly pressing it into the bottom and up the sides, being careful not to stretch or tear it.
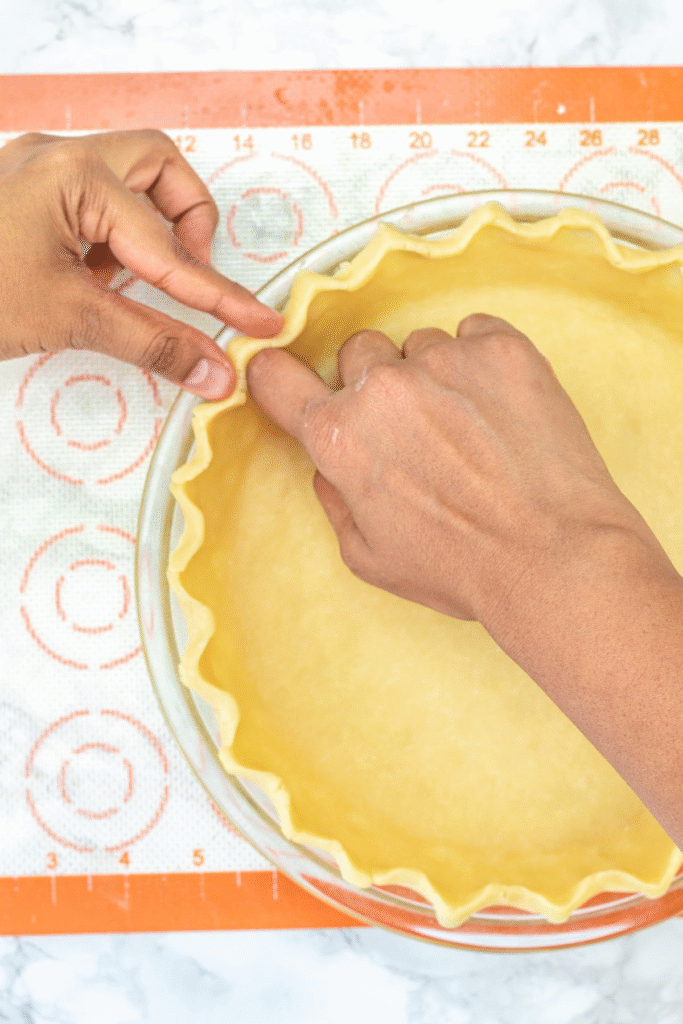
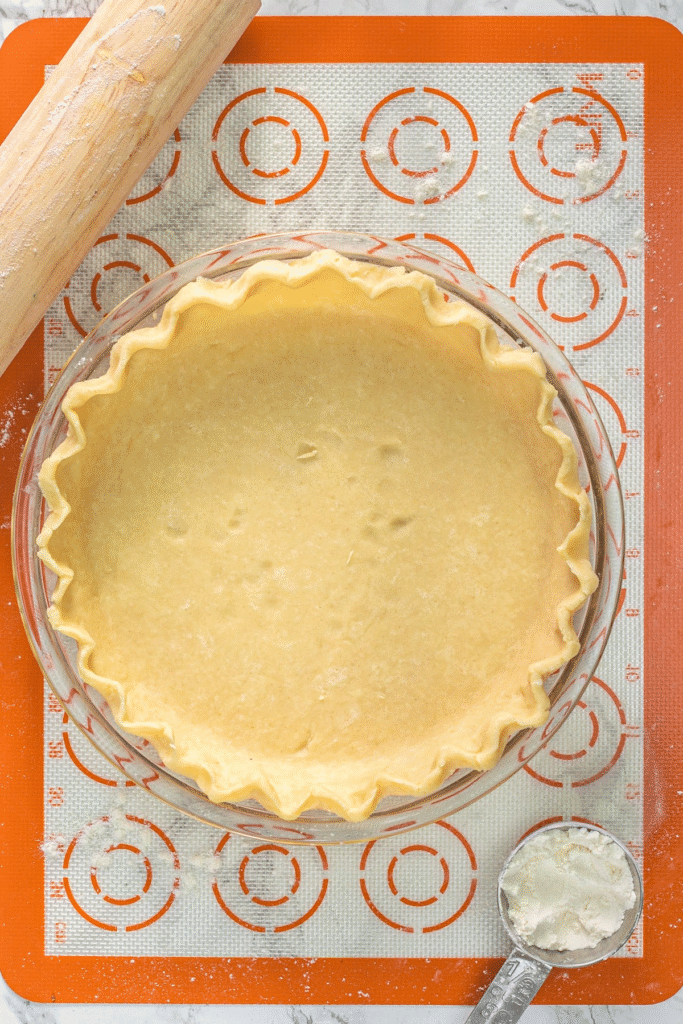
9, 10) Trim off any dough that extends beyond the rim. Use your fingers or a utensil to crimp or flute the edges into your desired design.
Place the pie crust in the refrigerator for 20 to 30 minutes, or until it feels firm to the touch. This resting time helps the dough relax and prevents shrinking during baking. Once chilled, you can proceed based on your recipe: either partially blind bake, fully bake the crust, or fill it and bake it all together.
💭 Tips For BEST Food Processor Pie Crust
- When making double-crust pies like traditional apple pie or hearty quiche, it’s wise to prepare a double batch of dough to ensure you have enough for both the base and the top layer.
- Precision matters—especially with flour. For the most precise results, always use dedicated dry measuring cups when measuring dry ingredients. Fill the cup to the top, then level it off with the flat edge of a knife or spatula to ensure accuracy—no guessing, no heaping.
- The key to a beautifully flaky crust lies in temperature. Keep your butter cold and use ice water to keep everything chilled while mixing.
- Try not to overwork the dough. Minimal handling is best to avoid a dense texture. Don’t worry if you see small chunks of butter—they’ll steam in the oven, creating light, flaky layers.
- Add the ice water slowly, ideally through the feed tube of your food processor while it’s running. This ensures even moisture distribution and prevents the dough from being over-mixed.
- Before wrapping the dough to chill, do a quick pinch test. If it holds together when pinched but isn’t sticky or crumbly, it’s good to go. If not, make tiny adjustments with flour or water.
- This resting period relaxes the gluten and helps the fat firm up again, both of which contribute to a better crust.
- If the dough starts to get sticky or too soft while rolling it out, just pop it back in the fridge for a few minutes. Working with chilled dough makes rolling and shaping much easier.
- To reduce the risk of your crust shrinking in the oven, always make sure it’s thoroughly chilled before adding your filling and baking.
🥣 Storage Instructions
- To Refrigerate: After preparing your pie dough in the food processor, shape it into a disc and wrap it tightly in plastic wrap to prevent it from drying out or absorbing other odors from the fridge. As an alternative, you can tuck the wrapped dough into a sealed, airtight container to provide an extra layer of protection against moisture and odors.. Store it in the refrigerator for up to 48 hours. Before using, let it sit at room temperature for 10–15 minutes to soften slightly, which makes it easier to roll out.
- To Freeze: If you’re planning to store the dough for a longer period, wrap the pie dough disc securely Wrap it in aluminum foil to shield it from freezer burn and preserve its texture and flavor during storage. You can also use a heavy-duty, resealable freezer-safe bag instead of foil for extra convenience. Label the packaging with the date, and freeze for up to 2 to 3 months. For best results, freeze the dough flat to save space and promote even thawing later.
- To Thaw: When ready to use frozen pie dough, transfer it from the freezer to the refrigerator and let it thaw slowly overnight. Avoid thawing it at room temperature, as this may cause uneven softening or butter to melt. Once thawed, allow the dough to sit at room temperature for a few minutes before rolling to ensure it’s pliable but still cold, which is key for a flaky crust.