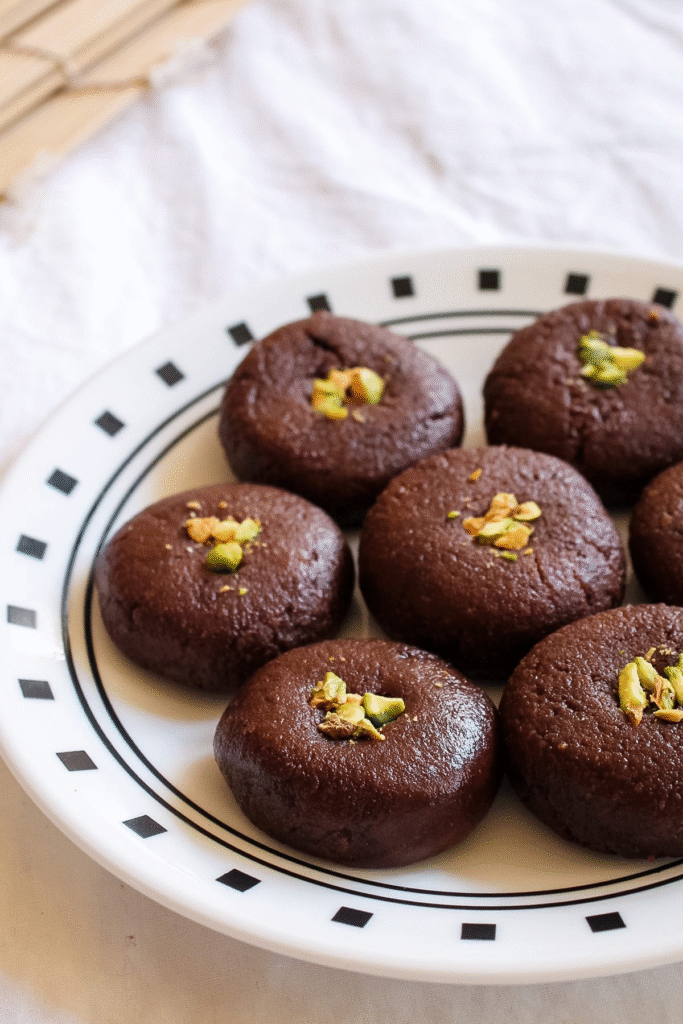
Easy Chocolate Peda – A quick and delightful Indian sweet treat that’s rich, chocolaty, and incredibly satisfying. This fuss-free recipe requires only three basic ingredients – condensed milk, cocoa powder, and milk powder – making it perfect for when you’re short on time but craving something decadent. In just 15 minutes, you can whip up these soft, melt-in-the-mouth pedas right on your stovetop, no fancy tools needed!
They’re finished with a garnish of chopped pistachios or almonds for that extra crunch and elegance, making them ideal for festive celebrations, quick dessert fixes, or gifting. Whether you’re a beginner in the kitchen or an experienced cook, these chocolate pedas offer a no-fail sweet with maximum flavor and minimal effort.
The result? A fudgy, indulgent treat that combines traditional Indian flavors with a modern chocolate twist – perfect for Diwali, Raksha Bandhan, or just a chocolatey craving!
❤️ You’ll Love This Chocolate Peda Recipe
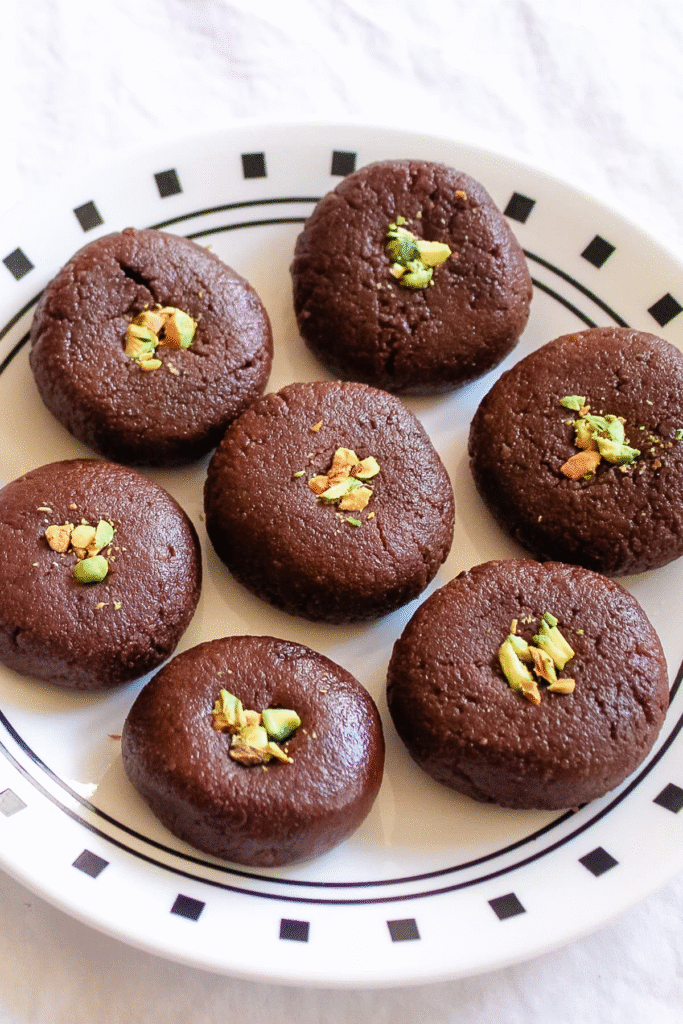
- A true delight for every chocolate enthusiast—this indulgent twist on a classic Indian sweet is where tradition meets irresistible cocoa charm! These indulgent chocolate pedas are packed with deep, rich chocolaty goodness, perfectly balanced with just the right hint of sweetness to satisfy your dessert cravings. Crafted with luscious, velvety khoya (mawa), these treats are decadently rich, perfectly dense, and irresistibly smooth—everything you love about a classic peda, now with an enchanting chocolaty upgrade
- Not only are they easy to make, but they also double up as the perfect festive treat to gift during special occasions. Simply arrange them in a decorative box or wrap them in festive wrappers, and you have a beautiful, homemade gift that friends, family, and loved ones will truly appreciate—especially during Diwali, Raksha Bandhan, or Bhai Dooj. Children are especially fond of these, thanks to their chocolatey charm and soft texture.
- During the festival season, while we all prepare classic Indian mithais, I love adding a modern twist by creating fusion sweets. Chocolate peda is one such creation, but I also enjoy experimenting with other delightful fusions like chocolate barfi, chocolate modak, and pista-filled chocolate rolls. These creative variations not only bring a fun element to your festive spread but also appeal to both traditional sweet lovers and those with a more contemporary taste.
🧾 Ingredients
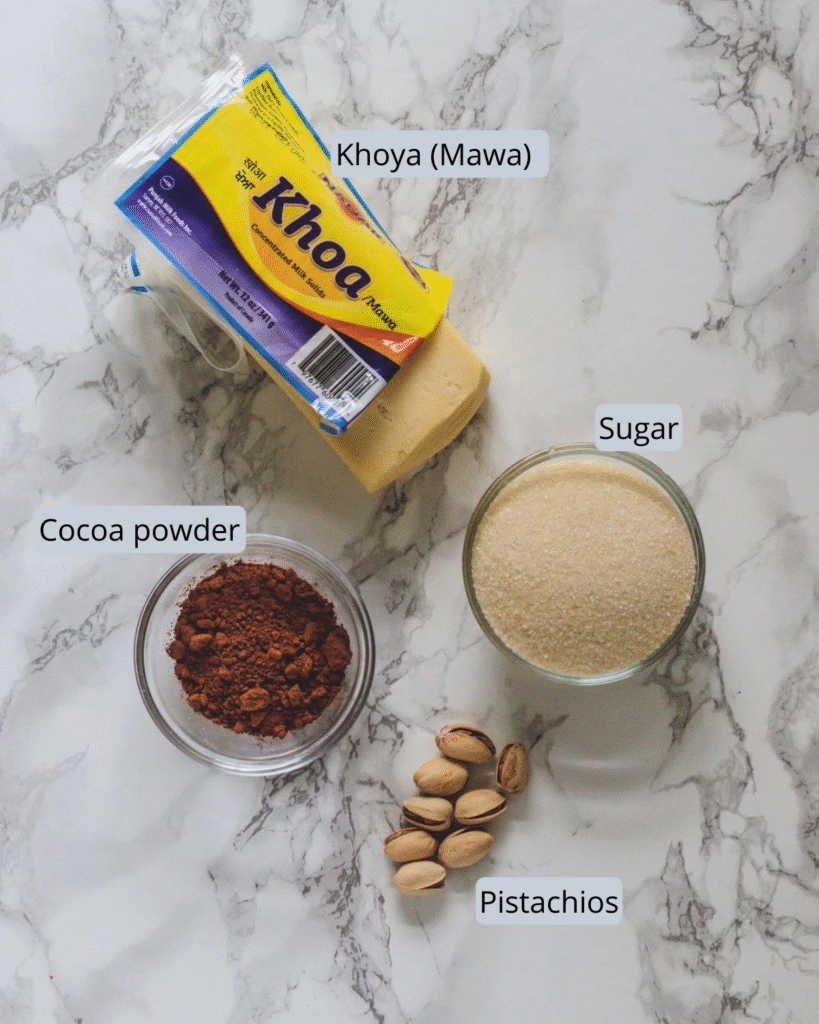
This image beautifully captures the key ingredients used in crafting rich and indulgent chocolate peda. The core trio includes creamy khoya (also known as mawa), which forms the dense and luscious base; finely granulated sugar that adds just the right amount of sweetness; and rich cocoa powder, which brings in that deep, chocolaty flavor that transforms a traditional Indian sweet into a modern treat. Topping it off are slivers of pistachios, used purely for garnishing—adding a pop of color and a delicate crunch that complements the soft texture of the peda perfectly. Simple in components yet luxurious in taste, these ingredients come together to create a sweet that’s both festive and irresistible.
- Khoya (Mawa): For this chocolate peda recipe, I’ve used store-bought khoya, which you can conveniently find in Indian grocery stores, usually placed near the dairy section. It offers a quick shortcut without compromising on taste. However, if you prefer a fresher and more homemade touch, you can easily prepare khoya from scratch using full-fat milk. Alternatively, for those looking to save time, there’s also a quick method to make instant khoya using milk powder, ghee, and a splash of milk. Whichever method you choose, khoya forms the rich and creamy base of this traditional sweet and is essential for that perfect peda texture.
- Cocoa Powder: I opted for Dutch-processed unsweetened cocoa powder, which is known for its deep chocolatey flavor and darker hue. The richness, taste, and color of your chocolate peda will heavily depend on the kind and quality of cocoa powder you use. While natural cocoa powder works too, Dutch-processed lends a smoother, less acidic flavor that balances beautifully with the sweetness of khoya and sugar. For best results, always choose a high-quality, unsweetened variety to let the chocolate notes truly shine in this fusion dessert.
👩🍳 How To Make Chocolate Peda? (Pics)
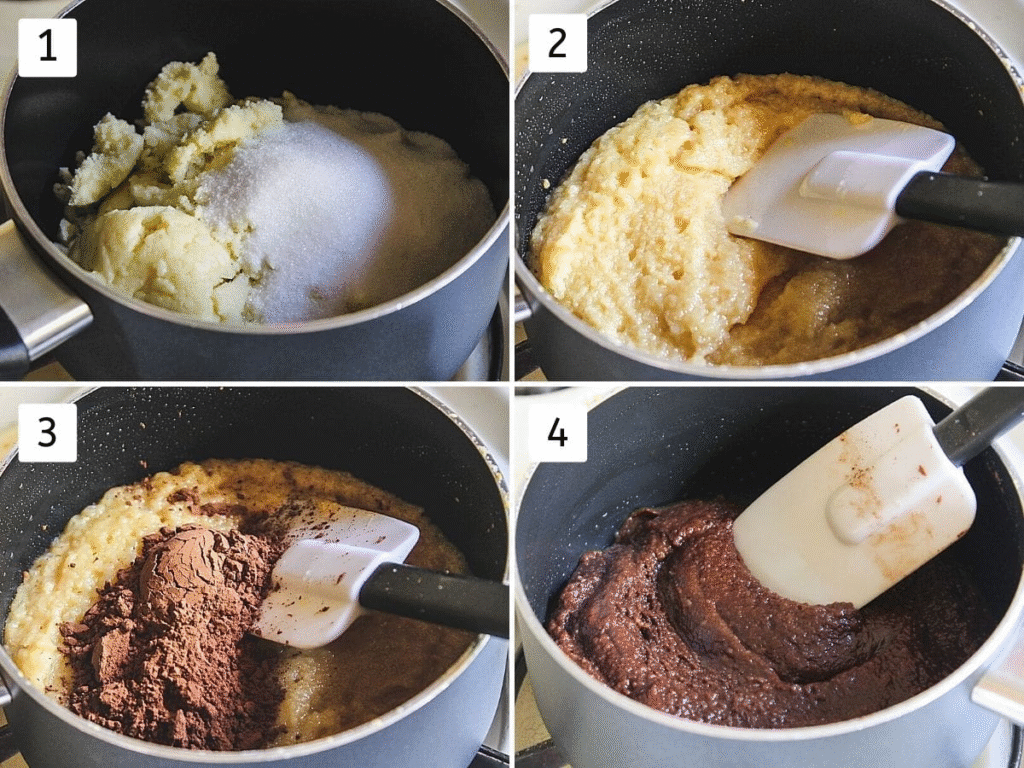
1) Begin by placing khoya (also known as mawa) and sugar together in a heavy-bottomed pan over medium heat. Stir gently at first to combine them well.
2) As the sugar softens it gets to be a free paste. Keep blending always and cooking until the blend gets to be thick and it takes off the sides of the pan. It took me approximately 6-7 minutes.
3) Once the mixture is thick, add the cocoa powder to the pan. Make sure to use good-quality unsweetened cocoa powder for a rich chocolatey flavor.
4) Blend well and cook for a miniature, turn off the stove.
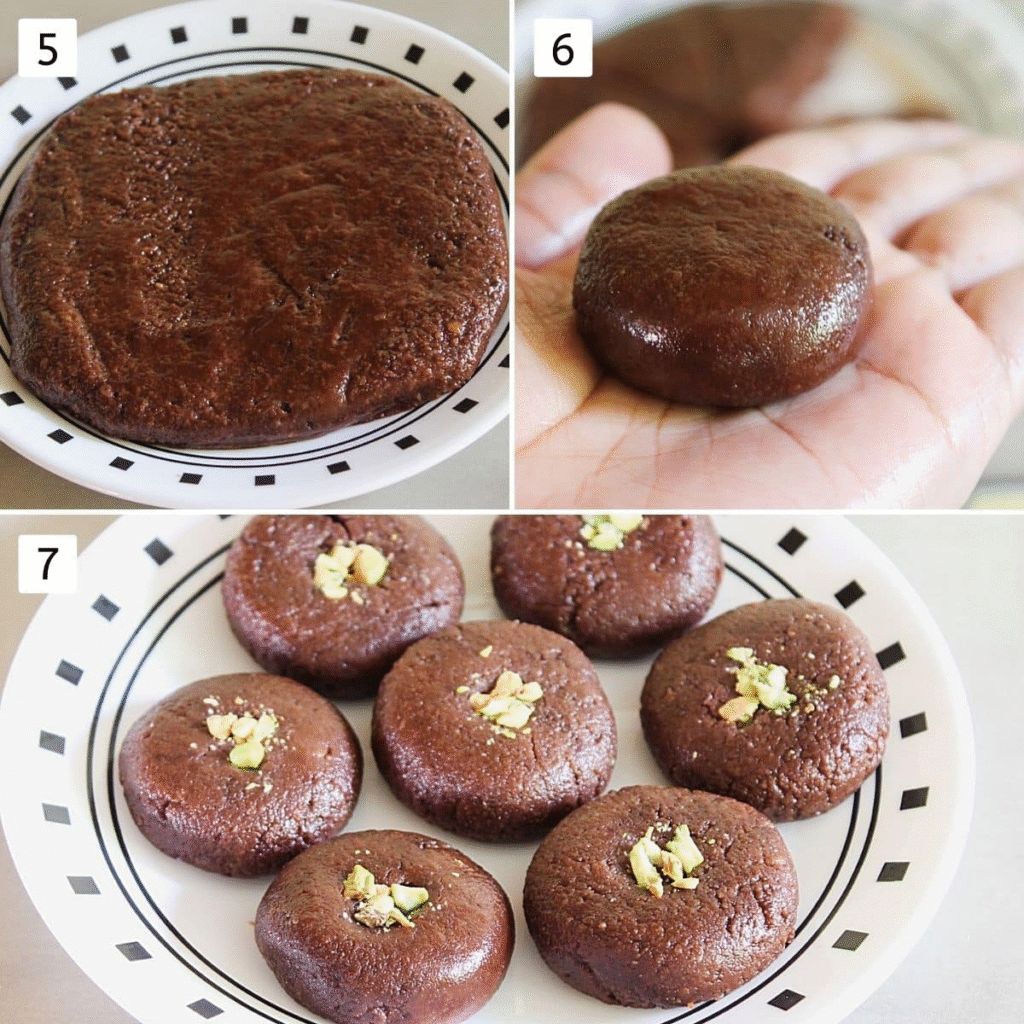
5) Expel it to a plate and let it cool to touch (warm).
6) Whereas it is still warm, partition it into 8 rise to parcels and begin forming into a smooth patty (peda shape).
7) Include chopped pistachio in the center and delicately press it into the chocolate peda so they adhere to it. Let it cool totally some time recently serving or pressing into the box.
💭 Tips For Making Chocolate Peda
- Avoid Overcooking: Be careful not to overcook the khoya and sugar mixture. If it’s cooked too long, it can lose its soft, melt-in-the-mouth texture and turn chewy or rubbery, which is not ideal for peda. As soon as the mixture thickens and starts to leave the sides of the pan, it’s time to turn off the heat.
- Cooking Time May Vary: The cooking time mentioned in the instructions is only an approximate guide. It can vary depending on several factors such as the quantity of ingredients you’re using, the size and thickness of your pan, and the strength of the flame. Always keep an eye on the consistency of the mixture rather than strictly following the clock.
- Easily Scalable Recipe: This recipe was made in a small batch, ideal for quick preparation or testing. However, it can easily be doubled or even tripled if you’re making it for a gathering or during festivals. Just remember that with larger quantities, you might need to adjust the cooking time and stir continuously to prevent burning.
🥣 Storage Instructions
- Once your chocolate peda has cooled completely, store them in an airtight container to preserve their freshness and prevent them from drying out. It’s best to arrange them in a single layer to avoid sticking or losing their shape. However, if you need to stack them, place a sheet of parchment paper or butter paper between each layer to maintain their texture and prevent them from sticking together.
- These peda stay fresh at room temperature for about 1 to 2 days, provided the weather is not too hot or humid. Ensure the container is stored in a cool and dry area, well away from direct sunlight or any sources of heat, to maintain freshness and prevent spoilage.
- For longer shelf life, especially during warmer months or if you’re living in a humid climate, refrigeration is highly recommended. If refrigerated correctly, they can remain fresh and flavorful for up to a week without losing their taste or texture.
- If the climate in your region is hot and sticky, it’s best to transfer the peda to the refrigerator shortly after they cool down to room temperature. This will help prevent them from becoming too soft or spoiling quickly.
- Before serving, allow the refrigerated peda to sit out for a few minutes so they return to their original soft, melt-in-the-mouth texture.
FAQs
Why does my peda mixture turn out grainy?
The grainy texture in peda can occur due to the quality of khoya (mawa) used—particularly if it has lower fat content or is not fresh. Khoya with a low moisture or fat level doesn’t blend smoothly during cooking, resulting in a slightly coarse texture. To fix this, it’s important to knead the mixture well while it’s still warm. This helps in smoothing out any graininess and makes the peda dough soft and pliable.
Additionally, while cooking the khoya and sugar together, keep mashing the mixture continuously with a spatula. This breaks down lumps and encourages a more homogenous texture. Stirring and pressing the khoya as it cooks ensures everything melts and blends uniformly, preventing gritty or uneven results.
Can I make chocolate peda using milk powder instead of khoya?
Absolutely, you can make chocolate peda using milk powder as a substitute for traditional mawa. To do this, combine 1 cup of full-fat milk powder, 2 teaspoons of ghee, and ¼ cup of milk to create an instant khoya-like base. Cook this mixture gently until it thickens and resembles the consistency of real khoya before proceeding with the rest of the recipe.
However, it’s important to use only full-fat milk powder—the kind commonly used in Indian sweets. Avoid using fat-free or non-fat milk powder, such as the varieties often sold in American grocery stores, as they lack the necessary fat content to deliver the richness and texture required for peda. Using the correct type of milk powder ensures the peda turns out creamy, soft, and delicious.