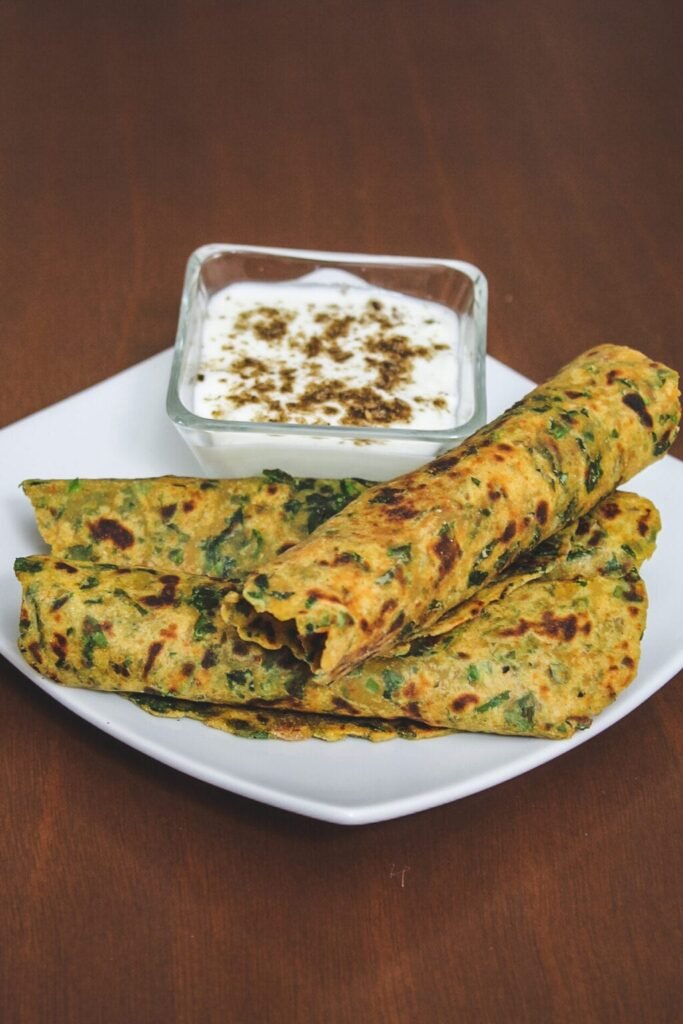
Methi Paratha is a wholesome and satisfying Indian flatbread that makes for an ideal breakfast option, especially when you’re looking for something nutritious yet flavorful. Made with fresh fenugreek leaves (methi), whole wheat flour, and a blend of traditional spices, these parathas are packed with earthy flavors and numerous health benefits.
When served hot with a dollop of fresh yogurt or a tangy Indian pickle, Methi Paratha becomes a delightful start to the day. The spices beautifully balance the slight bitterness of the fenugreek, and the softness of the dough makes it enjoyable for all age groups. Add a steaming cup of masala chai on the side, and you’ve got a comforting, energy-boosting meal that will keep you full for hours.
Whether you’re preparing breakfast for your family or looking for something easy to pack for lunch, Methi Paratha never disappoints. Its rich aroma, combined with the freshness of herbs and spices, makes every bite incredibly satisfying. Best of all, it’s simple to make and doesn’t require any fancy ingredients — just pantry staples and seasonal methi leaves.
This traditional North Indian dish is a beautiful reminder of how everyday ingredients can be transformed into something nourishing and delicious with just a little care and creativity.
About This Methi Paratha Recipe
Taste:
Fresh fenugreek leaves, commonly known as methi, are known for their distinct, slightly bitter taste. I enjoy this unique flavor — it adds a delightful earthiness to the paratha. That said, even if you’re someone who typically avoids bitter greens, don’t be quick to judge methi paratha. When the fenugreek leaves are incorporated into the dough and cooked into parathas, the bitterness mellows significantly. It balances beautifully with the warm spices and whole wheat flour, making the final dish deliciously savory without any unpleasant sharpness.
Still a bit hesitant about the bitterness? To tone down the bitterness of methi leaves, a helpful method is to sprinkle some salt over the washed leaves and allow them to sit for 15 to 20 minutes. After that, gently squeeze out the excess moisture before chopping and adding them to the dough. This step helps mellow the bitter flavor without losing the goodness of methi. After that, squeeze out the released water and then chop the leaves. This technique reduces the bitterness while still preserving the natural aroma and nutritional benefits of methi leaves.
Texture:
One of the best things about methi paratha is its wonderfully soft and pliable texture. These aren’t your typical dry or chewy parathas — they stay smooth for hours after cooking, making them perfect not just for breakfast but for lunch and travel too.
What’s the secret behind this softness? A boiled and mashed potato is kneaded into the dough. This simple addition does wonders for the texture, keeping the parathas tender and preventing them from turning tough or rubbery as they cool. It’s a small but impactful touch that makes a big difference, especially if you’re planning to make them in advance.
Perfect for Lunchboxes:
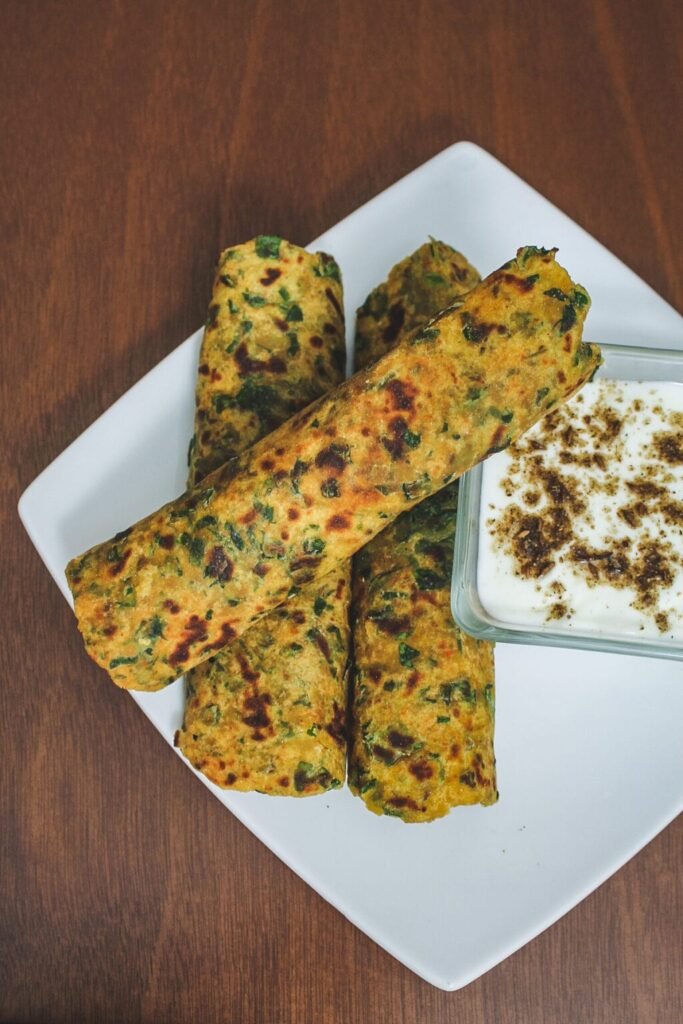
Thanks to their softness and versatility, methi parathas are a great option for lunchboxes — whether it’s for school, work, or a road trip. They don’t dry out quickly and hold their flavor well even when eaten at room temperature. Pack them with a side of cool yogurt, refreshing raita, or your favorite curry or sabzi in a separate container, and you’ve got a wholesome, satisfying meal on the go.
They’re not only easy to carry and eat without mess, but also sneak in some green goodness — a clever way to include leafy vegetables in meals for both kids and adults.
Ingredient Notes For Methi Paratha:
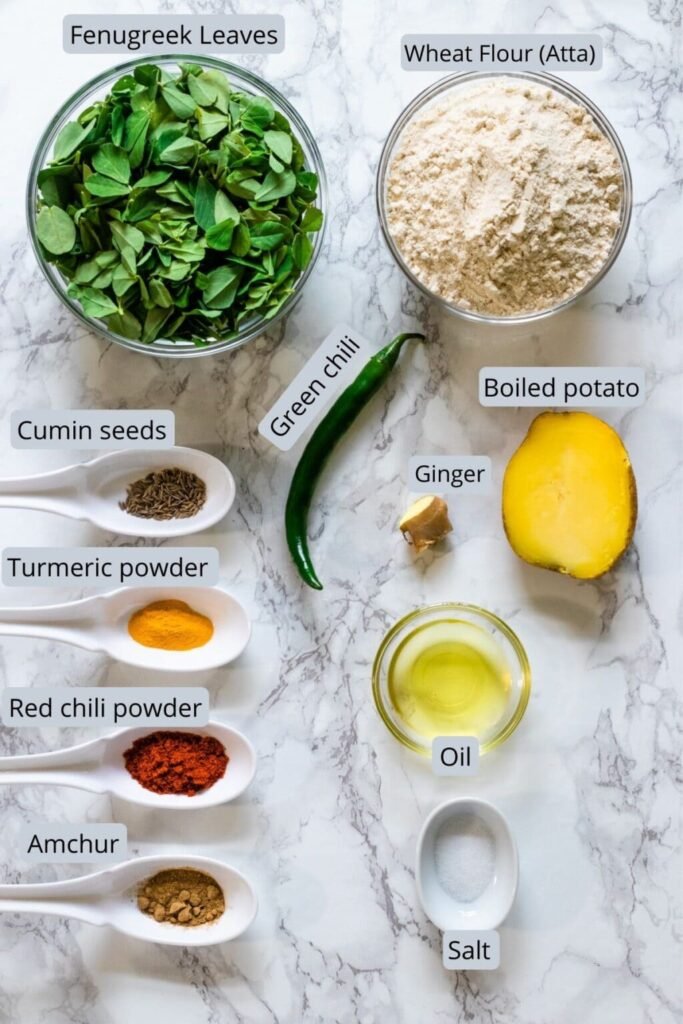
- Methi (Fenugreek Leaves): When fresh methi is in season, I always prefer using it for its vibrant flavor and aroma. However, at times, especially in Indian stores abroad, good-quality fresh methi isn’t available. In such cases, I use frozen methi as a backup. Since frozen methi is already cleaned and tightly packed, you’ll only need about ½ cup or less. Make sure to thaw and squeeze out any excess moisture before adding it to the dough.
- Boiled Potato: To make things easier, I usually boil the potatoes ahead of time in the Instant Pot. This saves time when preparing the dough. When ready, I simply grate the boiled potato and knead it into the flour. It helps make the parathas extra soft and keeps them from turning chewy, even after they cool down.
- Spice Level: If you’re making methi paratha for young children or those who prefer milder flavors, you can easily adjust the spice. Reduce or skip green chilies and red chili powder altogether. The methi, along with other mild spices, still gives a lovely flavor without overwhelming heat, making it a kid-friendly and family-approved meal.
How To Make Methi Paratha?
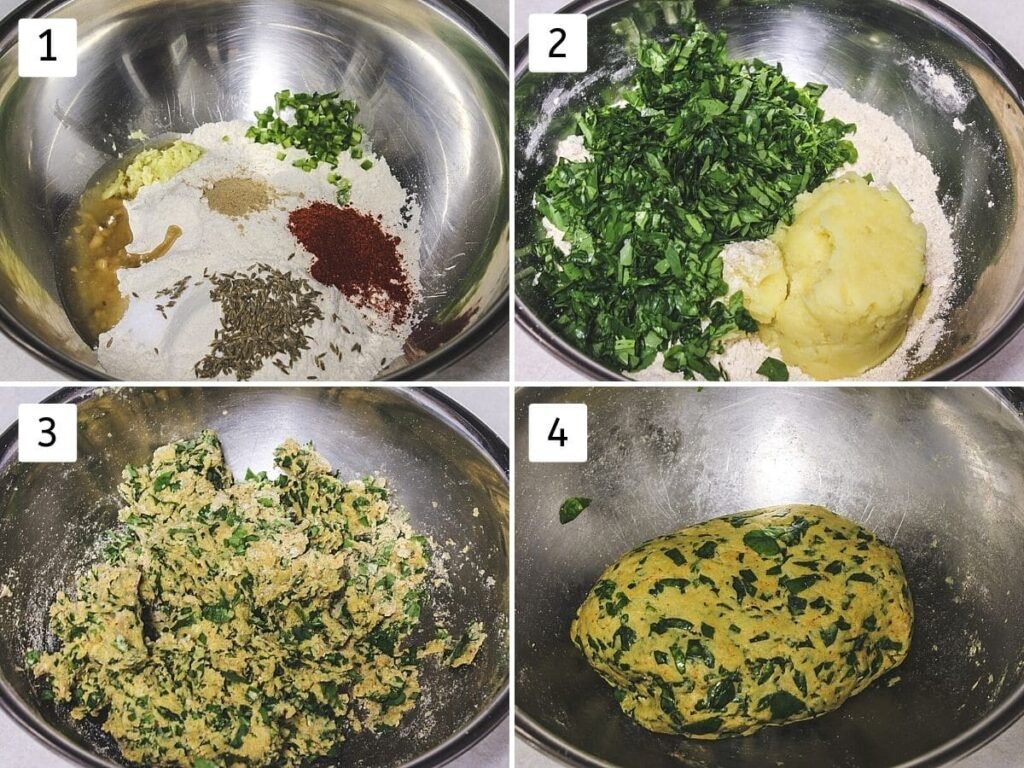
1) Prepare the Base Ingredients: In a large mixing bowl, add whole wheat flour (chapati atta), cumin seeds, red chili powder, turmeric powder (this is added later, so it may not be visible in the ingredient photo), amchur (dry mango powder), salt, freshly grated ginger or ginger paste, finely chopped green chilies, and a drizzle of oil. Combine all the ingredients thoroughly to ensure the spices and oil are evenly distributed throughout the flour.
2) Add Methi and Boiled Potato: Now, add the chopped fenugreek (methi) leaves that have been thoroughly washed and drained. Follow this with mashed or grated boiled potatoes. Both ingredients contribute moisture and flavor to the dough.
3) Mix Well to Form Dough: Begin mixing everything together. The moisture from the chopped methi leaves and mashed potatoes helps in bringing the flour together. As you mix, the dough will slowly start to form without the need for much additional water.
4) Knead into a Soft Dough: Keep kneading the mixture until you get a smooth and soft dough. Note: In most cases, additional water isn’t needed. Usually, the moisture present in both the methi leaves and boiled potatoes is enough to form the dough without needing extra water. However, depending on your ingredients’ moisture content, you may add a small amount of water if required.
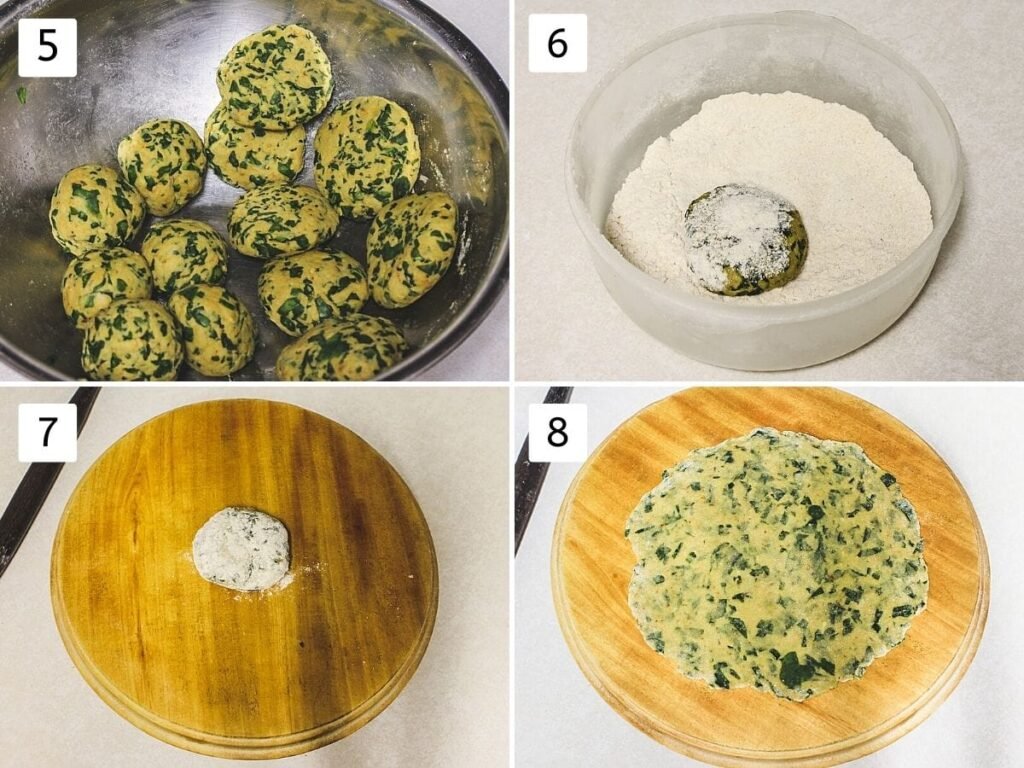
5) Let the Dough Rest: Cover the dough and allow it to rest for about 15–20 minutes. This resting period helps the gluten develop, making the dough easier to roll. After resting, knead the dough again briefly and divide it into 12–13 equal-sized portions. Roll each into a smooth ball and gently flatten it between your palms.
6) Prepare for Rolling: Take one portion at a time and dust it lightly with dry flour on both sides. This prevents sticking while rolling.
7) Begin rolling the Paratha: Place the floured disc on a rolling board and use a rolling pin to gently roll it out into a flat circle. Aim for an even thickness throughout.
8) Roll to Desired Size: Roll the dough into a circle roughly 6 inches in diameter. Avoid making it too thin, as we want a soft paratha that doesn’t tear while flipping.
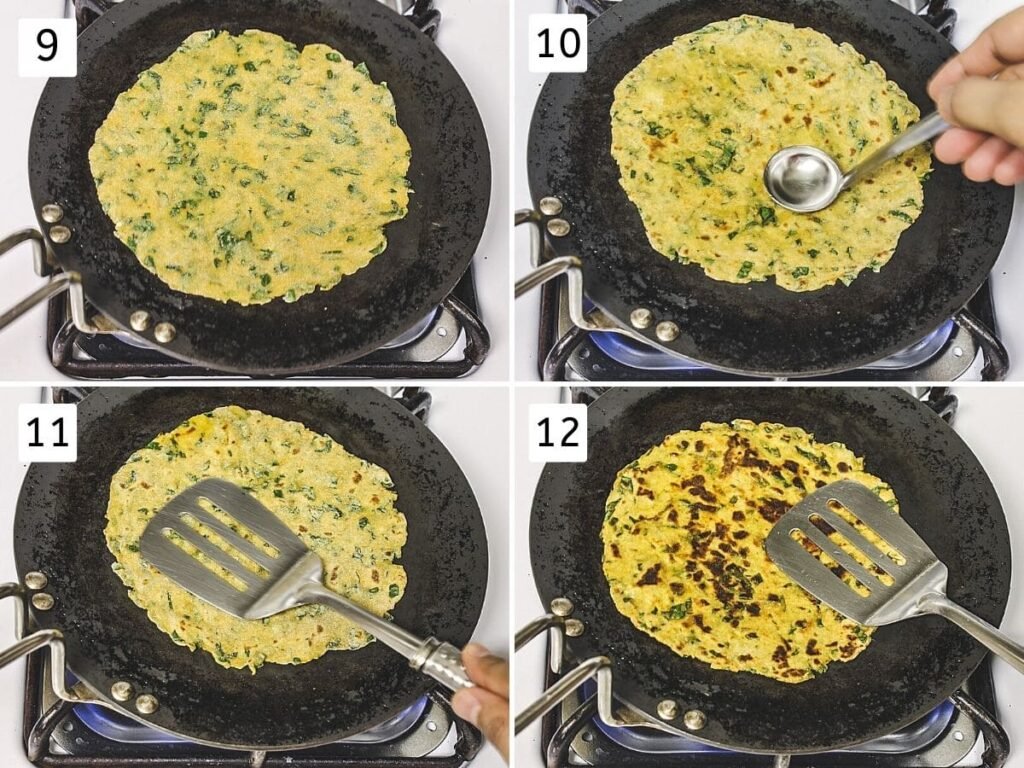
9) Preheat the Tawa: Place a tawa or flat skillet over medium heat. Once hot, carefully place the rolled paratha onto the surface.
10) Initial Cook and Flip: Let it cook for a few seconds until you notice bubbles forming on the surface. Flip the paratha using a spatula — the bottom should have light brown spots. Brush the exposed side with oil.
11) Cook with Oil on the Bottom Side: Flip the paratha again, so the oiled side is facing down. Press gently with a spatula to help it cook evenly. Golden brown spots will begin to appear as it crisps.
12) Final Flip and Cook: Brush oil on the top side now, flip once more, and cook the final side. When both sides develop golden brown spots and the paratha is fully cooked, take it off the pan and set it aside.
Transfer the cooked paratha to an insulated container or wrap it in a clean cloth to help retain its warmth and softness. Repeat the same process for the remaining dough balls.
Expert Tips
1) Roll in Batches If You’re Not Quick:
Unlike our moms who masterfully roll and cook parathas at lightning speed, many of us need a little more time — and that’s perfectly okay! A helpful trick is to roll out 5–6 parathas first and place them on a large plate. Make sure they slightly overlap but don’t stack them, as this can make them stick together. Cover them with a clean kitchen napkin to prevent drying. Then, cook these parathas one by one. Roll and cook the parathas in small batches to make the process easier and more manageable without feeling rushed.
2) Adjust Methi to Your Preference:
Feel free to reduce the quantity of methi leaves based on your taste. In our home, we love the earthy flavor of methi, so I tend to use a generous amount. But if you prefer a milder taste, you can easily cut down the methi without affecting the overall flavor.
3) Use Ghee for a Rich Flavor:
For a richer and more traditional taste, I prefer frying the parathas in ghee instead of oil. It adds a lovely aroma and enhances the flavor. Plus, I use ghee especially for my child — growing kids benefit from the healthy fats in ghee.
4) Try a Potato-Paneer Twist:
At times, I swap a portion of the mashed potato with grated paneer in the dough. It gives a soft texture and added nutrition. My daughter enjoys this variation, and it’s a great way to make the paratha more protein-rich.